What the manual doesn't tell you - Ender 3 Pro initial setup
The Ender 3 is a great value printer, but newbies should look out for these gotchas.

The Ender 3 printers are great.
It is so impressive that the price can be driven so far down, but the printer still ends up being solid and reliable.
While this is an entry-level-priced printer, the initial setup has some serious gotchas that will frustrate the heck out of brand new users.
Following the manual is fairly straightforward. If you have ever built lego or IKEA furniture by following the directions, you shouldn't get too lost. If you do get lost there are likely to be many YouTube videos showing how to assemble them. If you are still stuck, feel free to get in touch on Twitter and I might be able to help.
Anyway, once it is fully assembled, you would assume that you are ready to print, but here are the parts that the manual doesn't tell you about.
Tighten your Y-belt
The Y-axis belt; the belt for the bed movement was very loose on mine out of the box.
This part came pre-assembled, so I didn't think to check it, but when I tried to "Auto Home" the printer, the Y-axis would skip on the belt instead of stopping properly at the end of its travel against the end stop.
Tip to "Auto Home" your printer:
- From the main screen press the control knob to go to the main menu
- On the main menu rotate the knob to select
Prepareand select it by pressing the control knob - In the
Preparemenu, selectAuto Home
Auto Home sends the printer to the home position which is usually at the end stops of each axis.
Once the printer has bumped the end stops of all 3 axes, it then knows exactly where the print head is with respect to all 3 axes.
Auto home is usually automatically done as one of the first steps of a print, once the bed and extruder have finished heating, so you usually don't need to trigger it manually. But, it is a good first step when testing out a new machine or zeroing it before controlling the axes directly.
I was worried that the end-stop switch was dead, but tightening the belt removed the issue entirely.
Z-Axis binding oversight
Once I had the printer home I tested the full range of each axis through the device screen interface.
I noticed that the Z-axis motor would get about a third of the way up before starting to skip.
For new users, skipping makes a juddering noise that is very different from the normal motor sound.
Being a software developer, my instinct was to search online to see how others have solved the issue (Stack Overflow has taught me well).
I found a Reddit post explaining that the motor was not properly supported and that it would twist downwards under load and bind the lead screw. The post also suggested a couple of parts to print to support the motor and serve as a permanent solution.
This is a good explanation of the problem and suggests a large print to support the motor.
This post had the same issue, but this comment suggested a different solution involving 2 small printed shims.
I ended up going the shim route as the only PLA I had was the small amount that the printer came with.
This is one of the coolest parts of owning a 3D Printer; using the printer to make the parts to fix or upgrade itself.
The binding for me was after at least 1/4 Z-axis travel, so I could probably have printed the new parts in the current state and then installed them. But to play it safe I used the Ender 3 manual to shim the motor while printing the new parts.
But it did the trick and soon I was up and printing the shims.
You may have noticed a weird piece of wood under the bed in the bottom right corner of the video. That is the next thing I had to fix before I could get to my first print.
Bed leveling facepalm
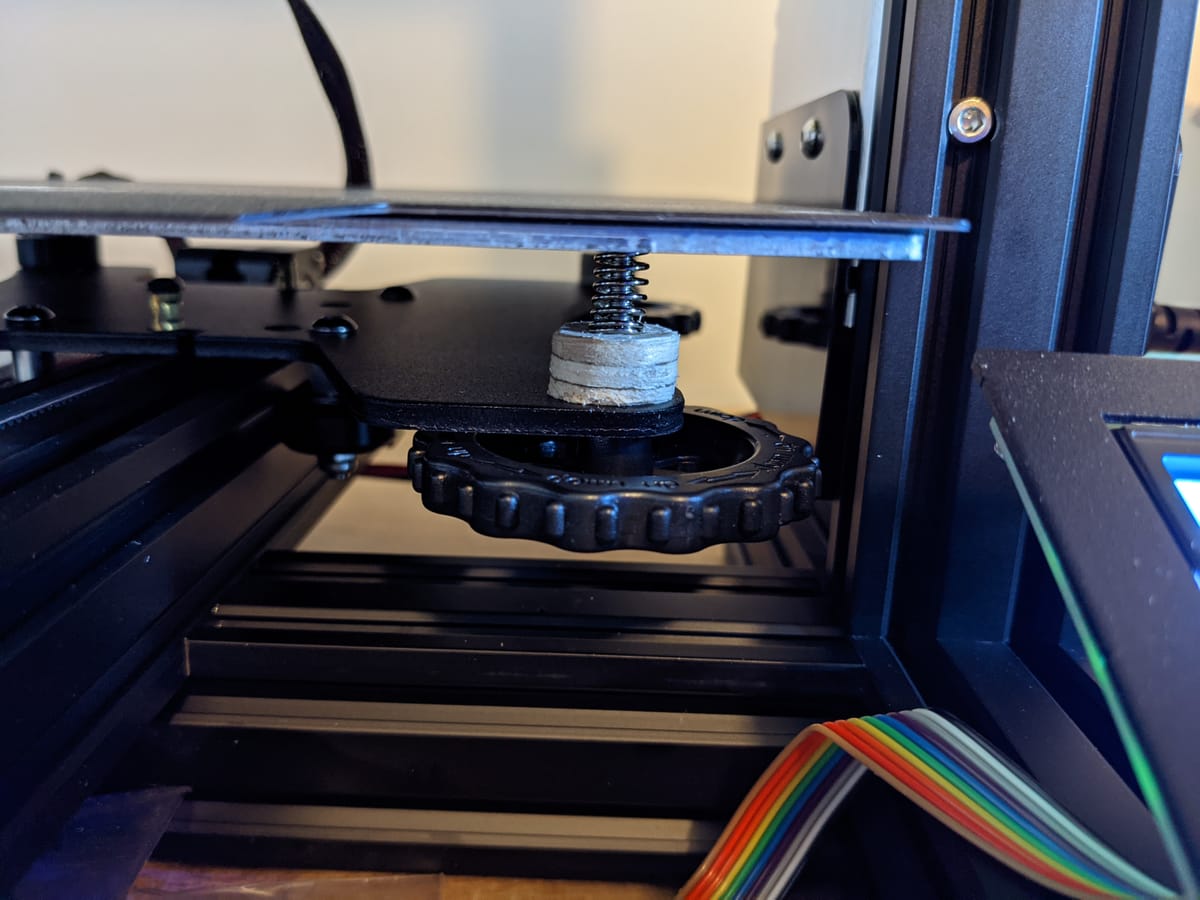
So, I am not exactly sure why, but for some reason, the Ender 3 Pro has this big plastic cup-like thing under the one corner of the bed.
Maybe it is there so that you don't screw the bed down too much and pinch the heated bed wires?
This seems to me like a case of solving a problem by creating another problem.
The bed leveling springs are only about 10mm tall. This cup thing is 9mm tall and internally about 8mm tall and the spring sits inside of that cup.
If you haven't already guessed, it means that spring travel on that corner is now reduced to a total of 2mm of travel to try and level the whole bed.
What is worse is that since the base of the cup is about 1mm thick, it means that the rest of the corners can only use the top 1mm of their spring travel to try and get themselves level with this problem corner.
And to top all of it off, the Z end stop switch in the default position was too low to get triggered in that corner when the bed was jacked all the way up to try and get it level.
So this needed a rethink. A rethink that didn't require 3D Printed parts as a level bed is critical for the printer to work properly.
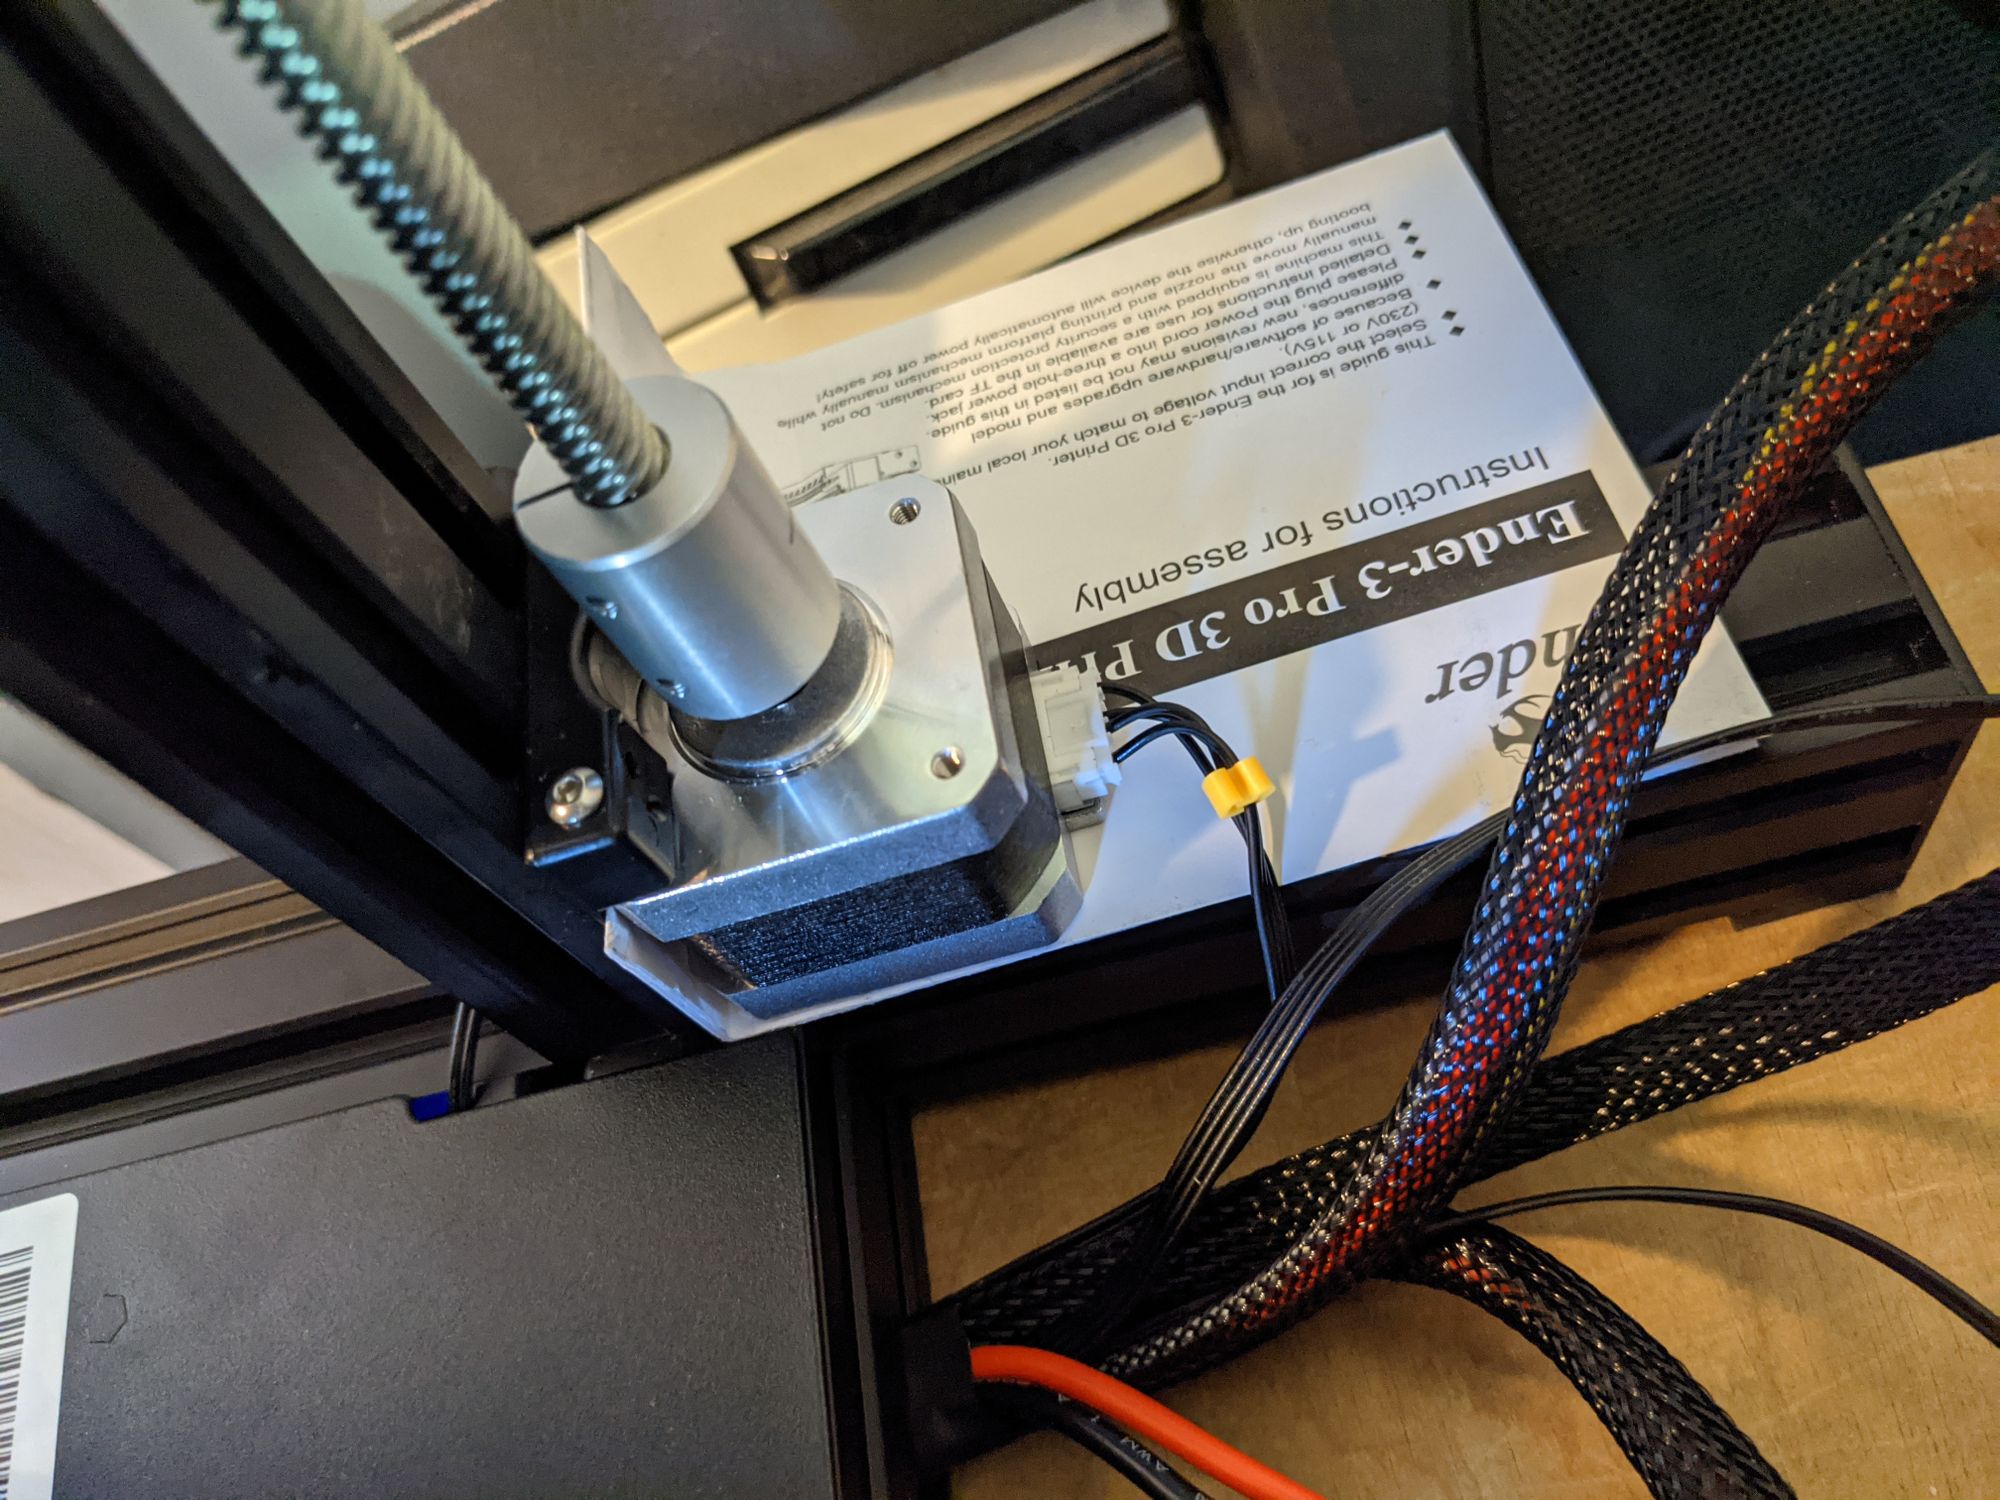
I planned to lift the base of the spring to near the top of that cup (and then match that height on the other corners) so that I could use the entire length of the spring travel to level the bed.
I checked my stash of random screws, nuts, and bolts in the basement but all I could find were 2 thin washers that would definitely not have done the job.
Thinking quickly I checked my hole-saw kit and I had one that would cut holes of the correct diameter and I had some plywood that was about the right thickness and within a couple of minutes, I had some makeshift spacers.
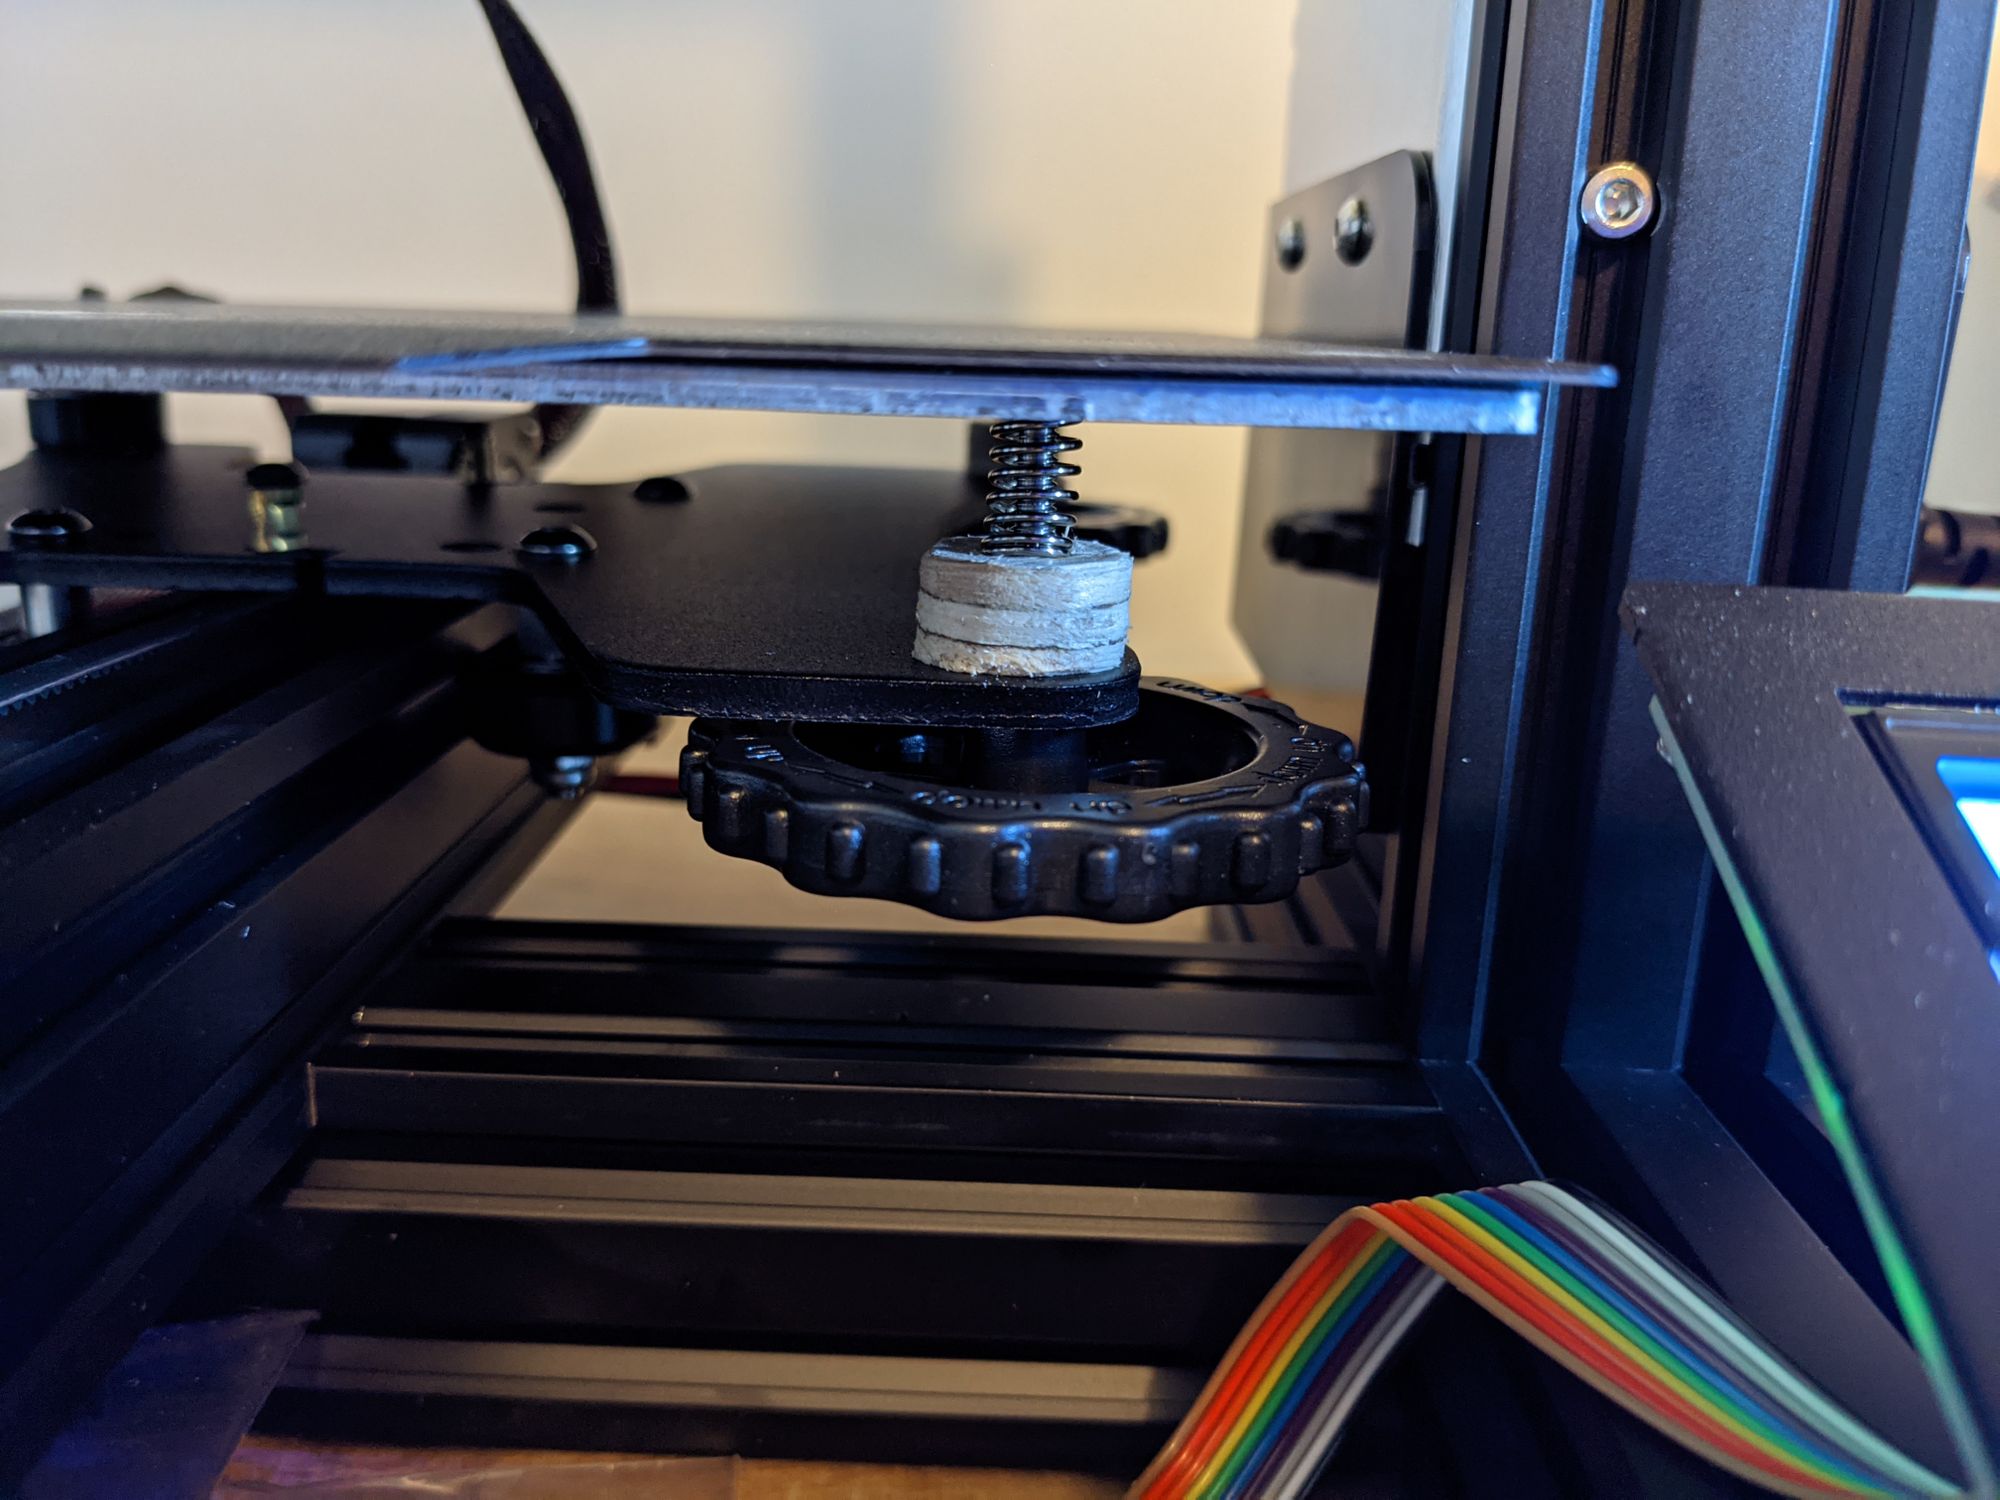
The wooden spacers worked perfectly and I was able to level the bed properly to get printing on the motor shim.
A stack of about 6 washers per screw is probably the easiest solution for this problem. You can also purchase longer and stiffer screws online.
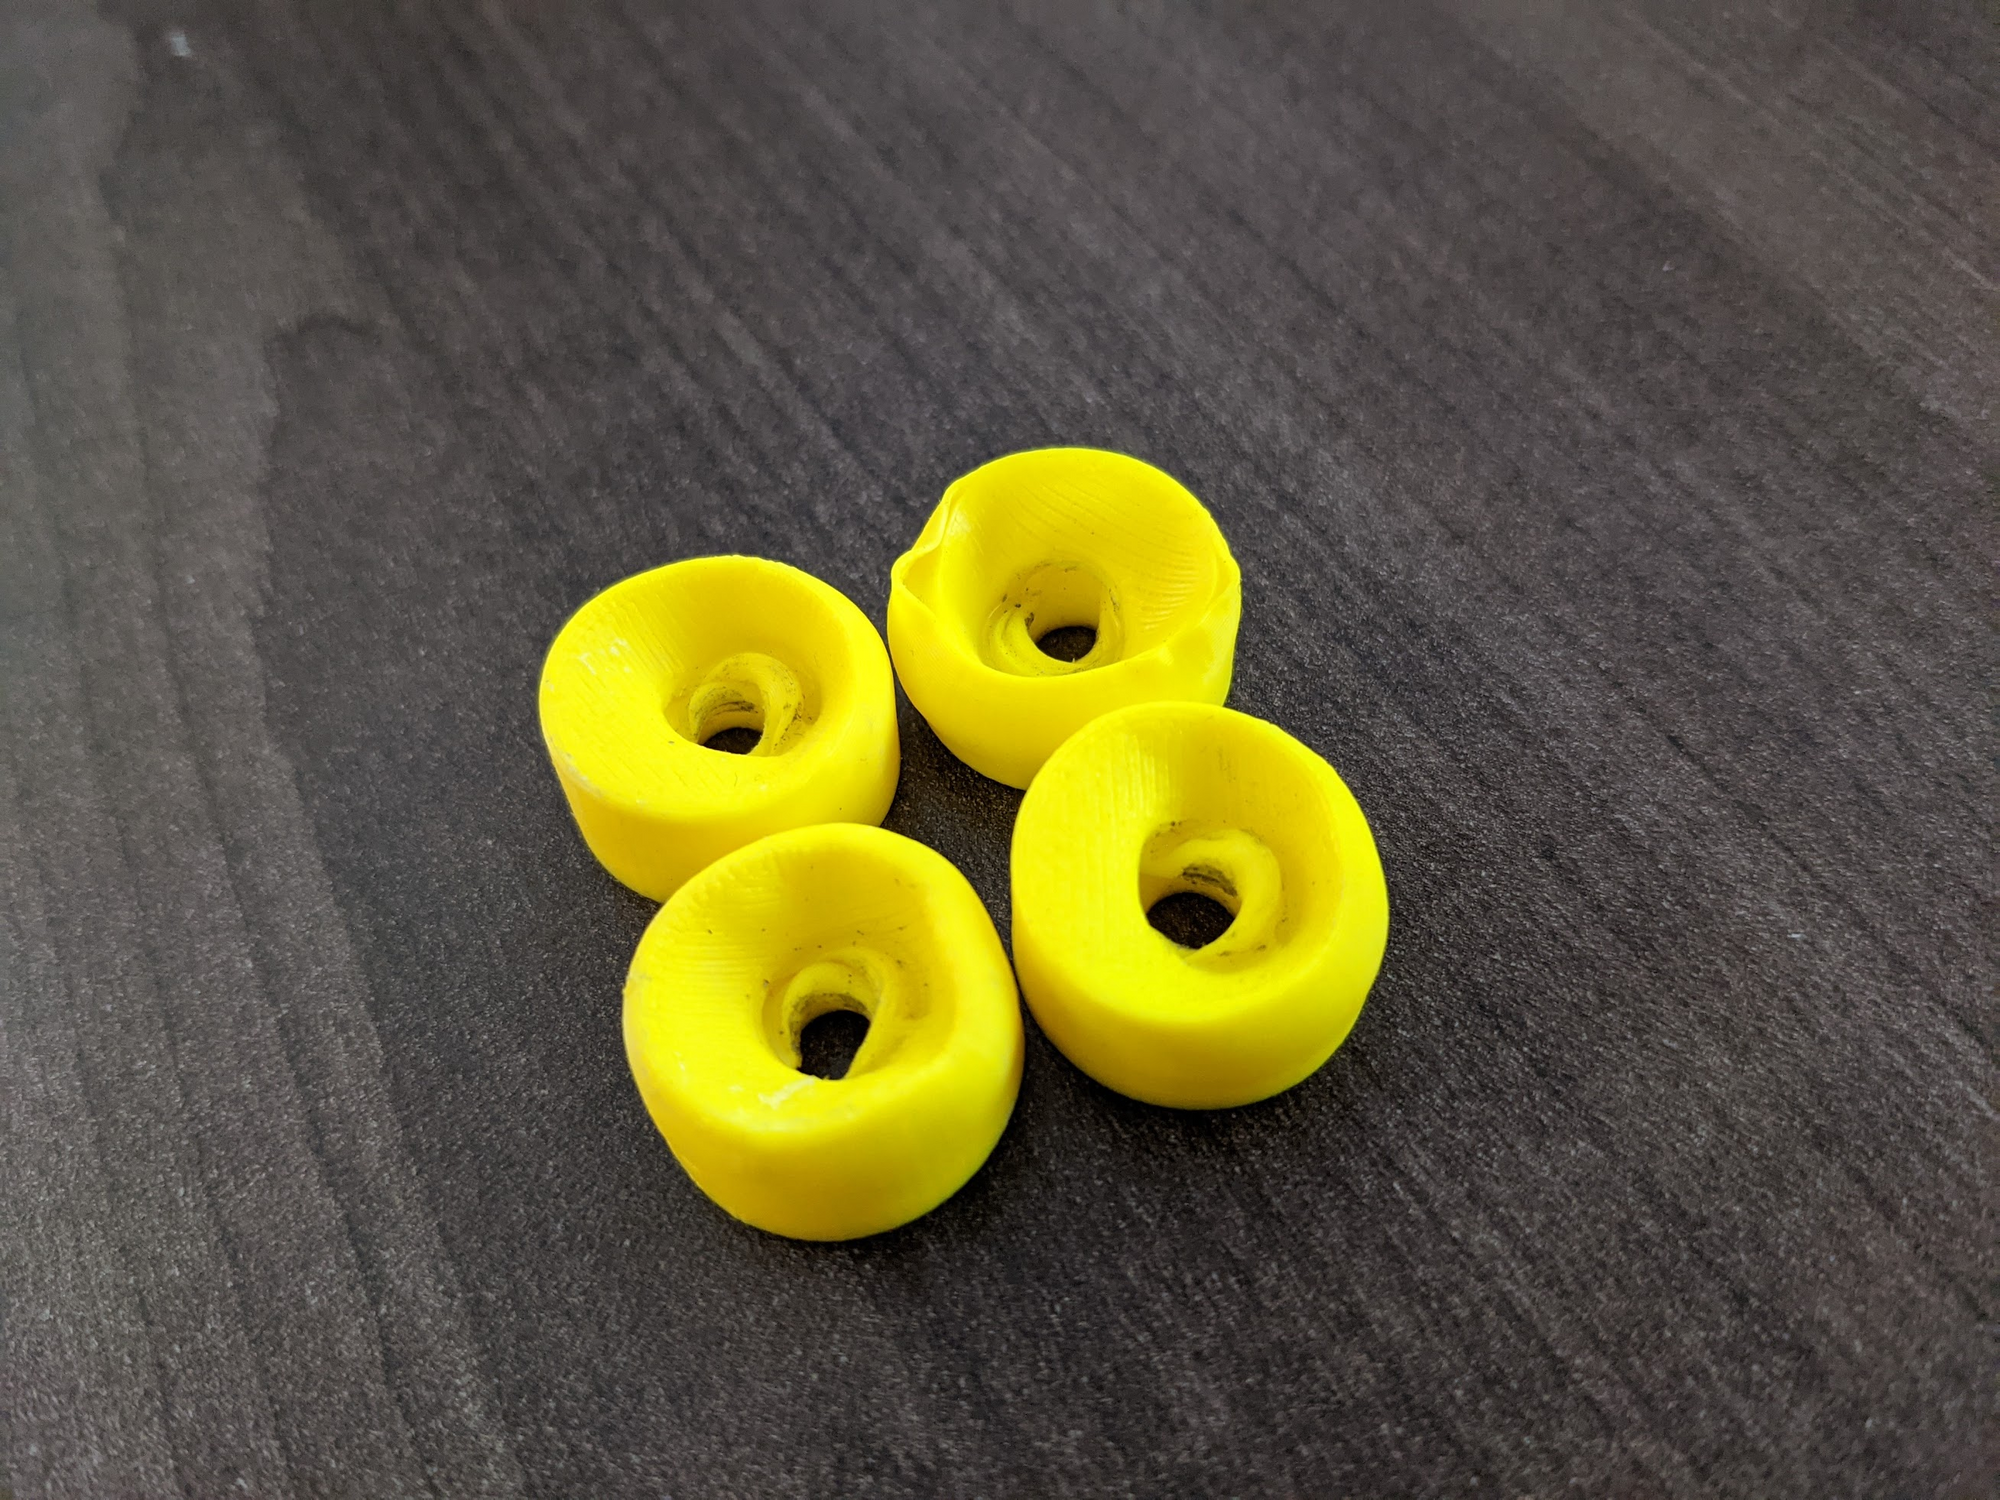
One thing I tried with my second Ender 3, was to print spacers. I put them at the bottom the same way I did with the wooden spacers, but the heat transfer from the springs was too much for them, so don't do that.
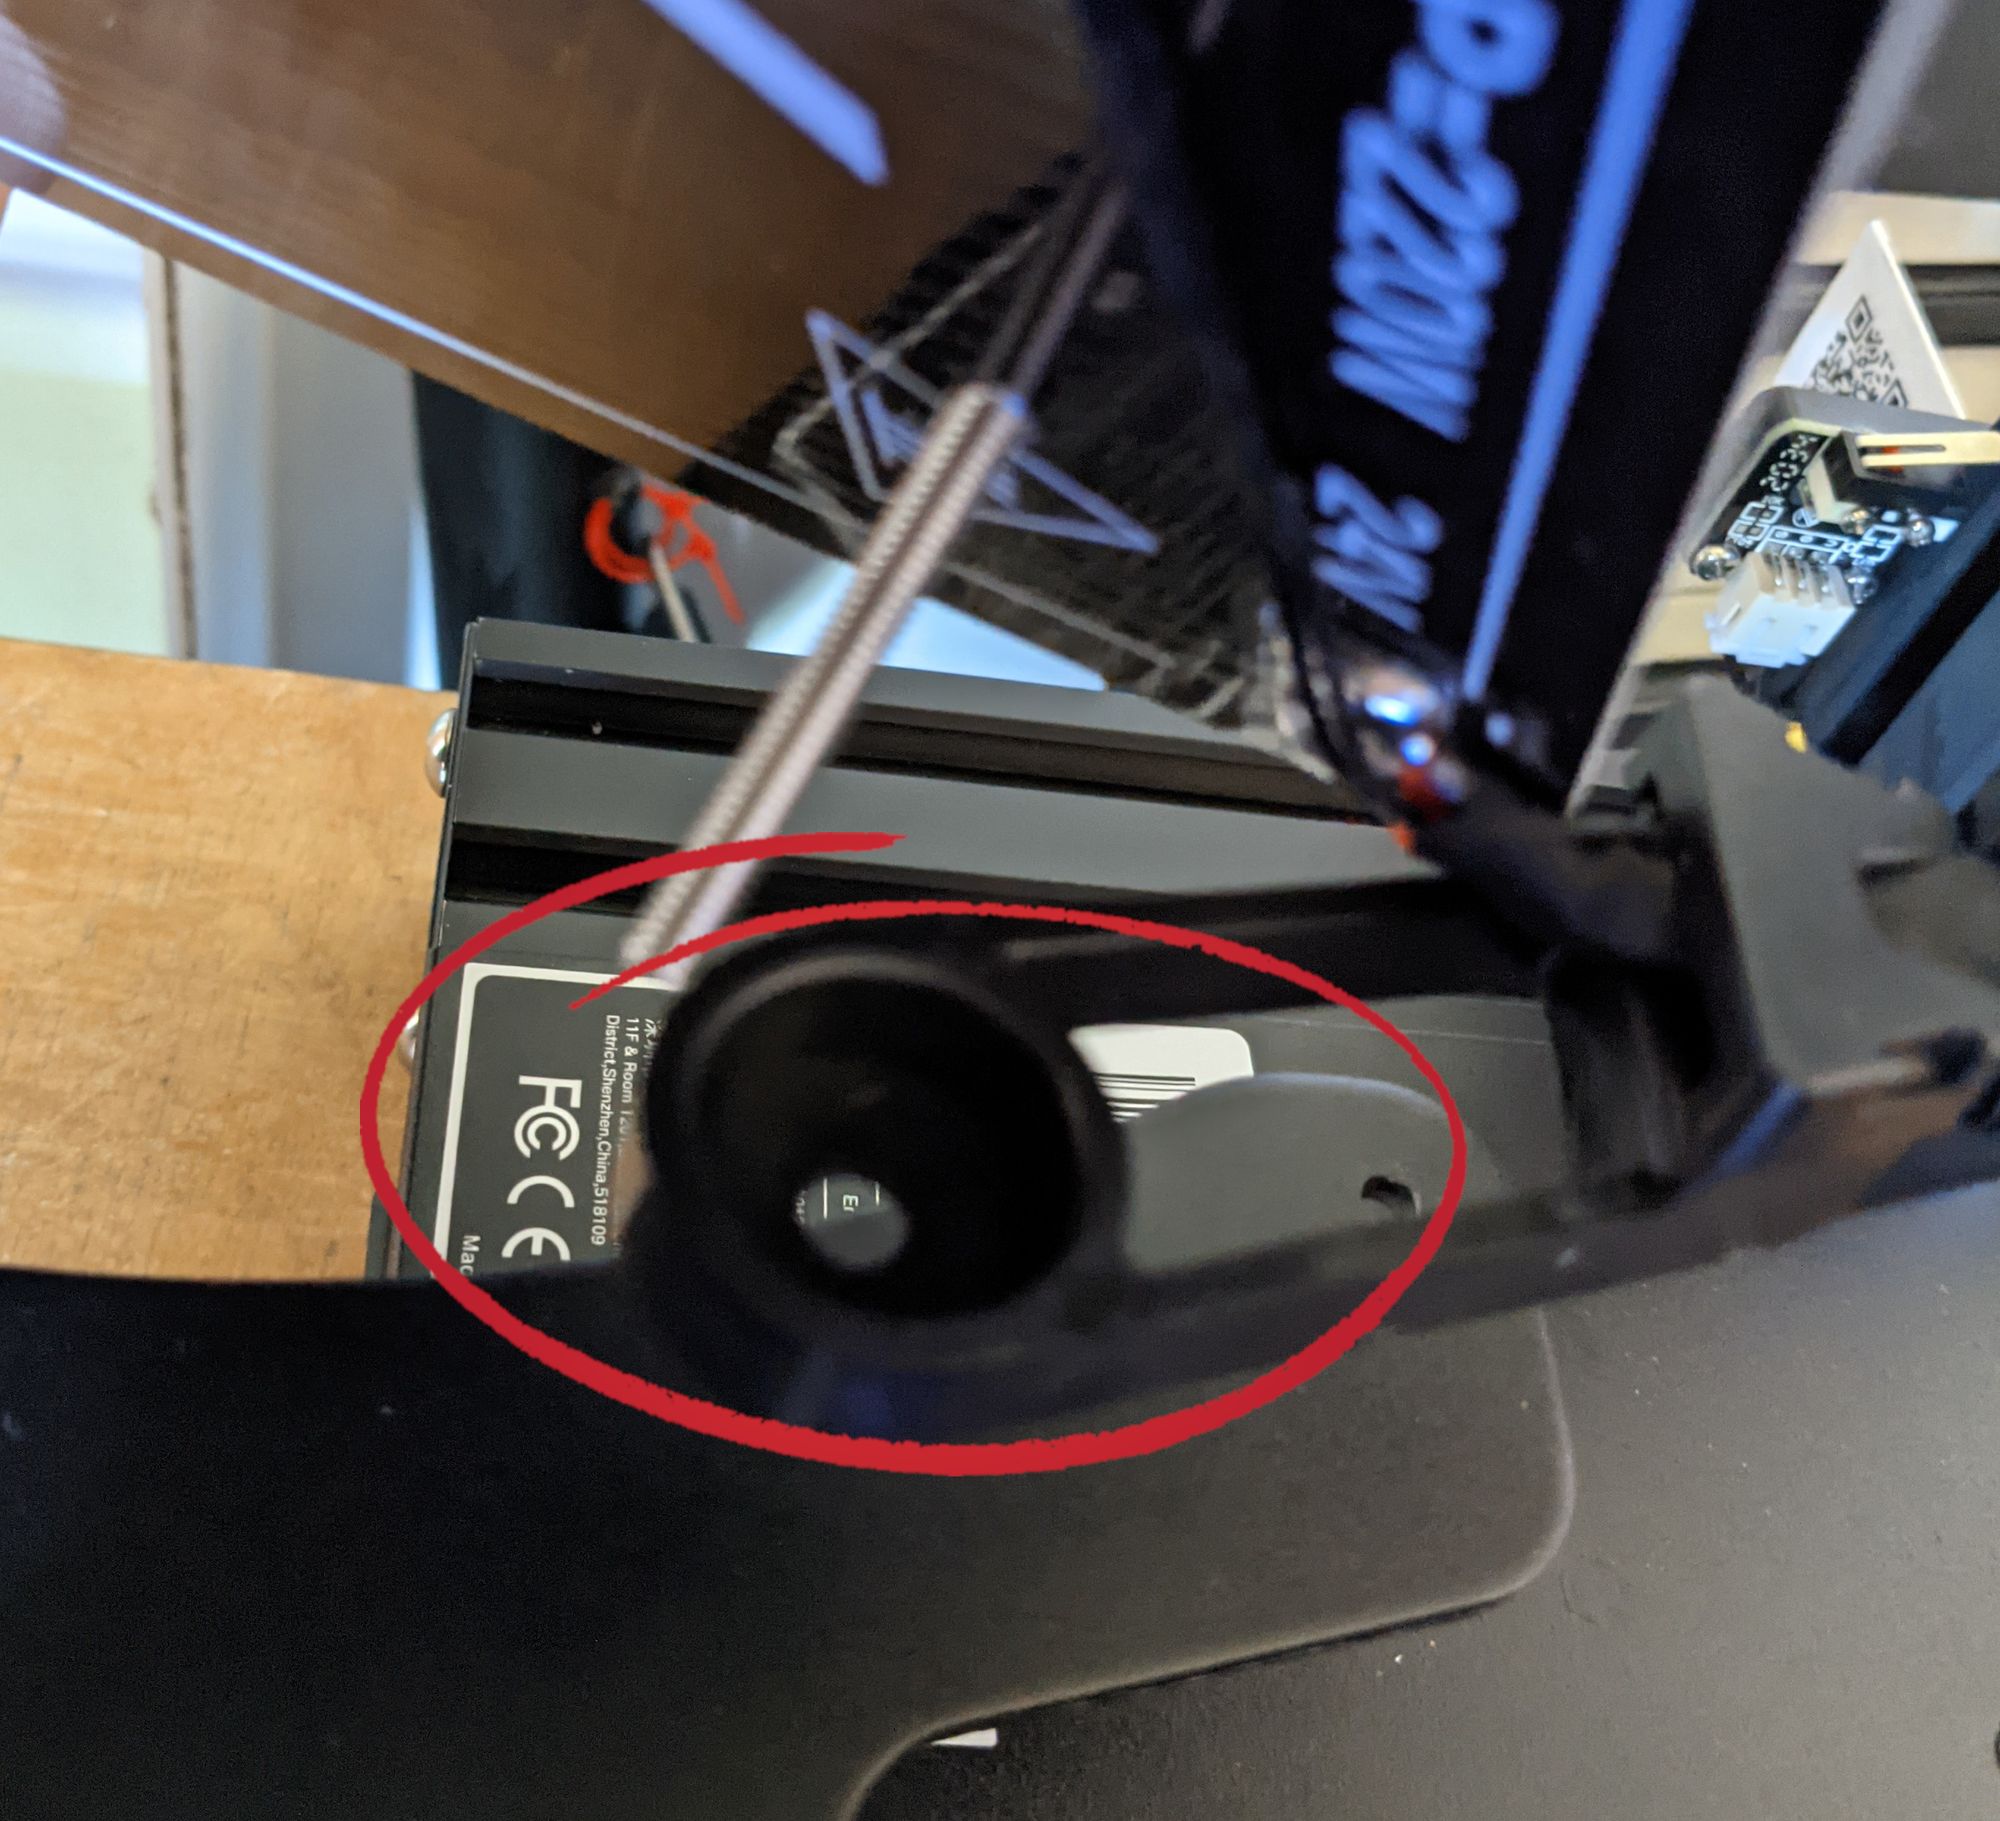
As I mentioned before, the Z end stop switch was already too low in its normal state and now I had lifted the bed another 9mm or so. The fix for this was simple, I had the extruder nozzle touching the roughly leveled bed and then I loosened and lifted the end stop until it clicked when contacting the part of the gantry that connected with it.
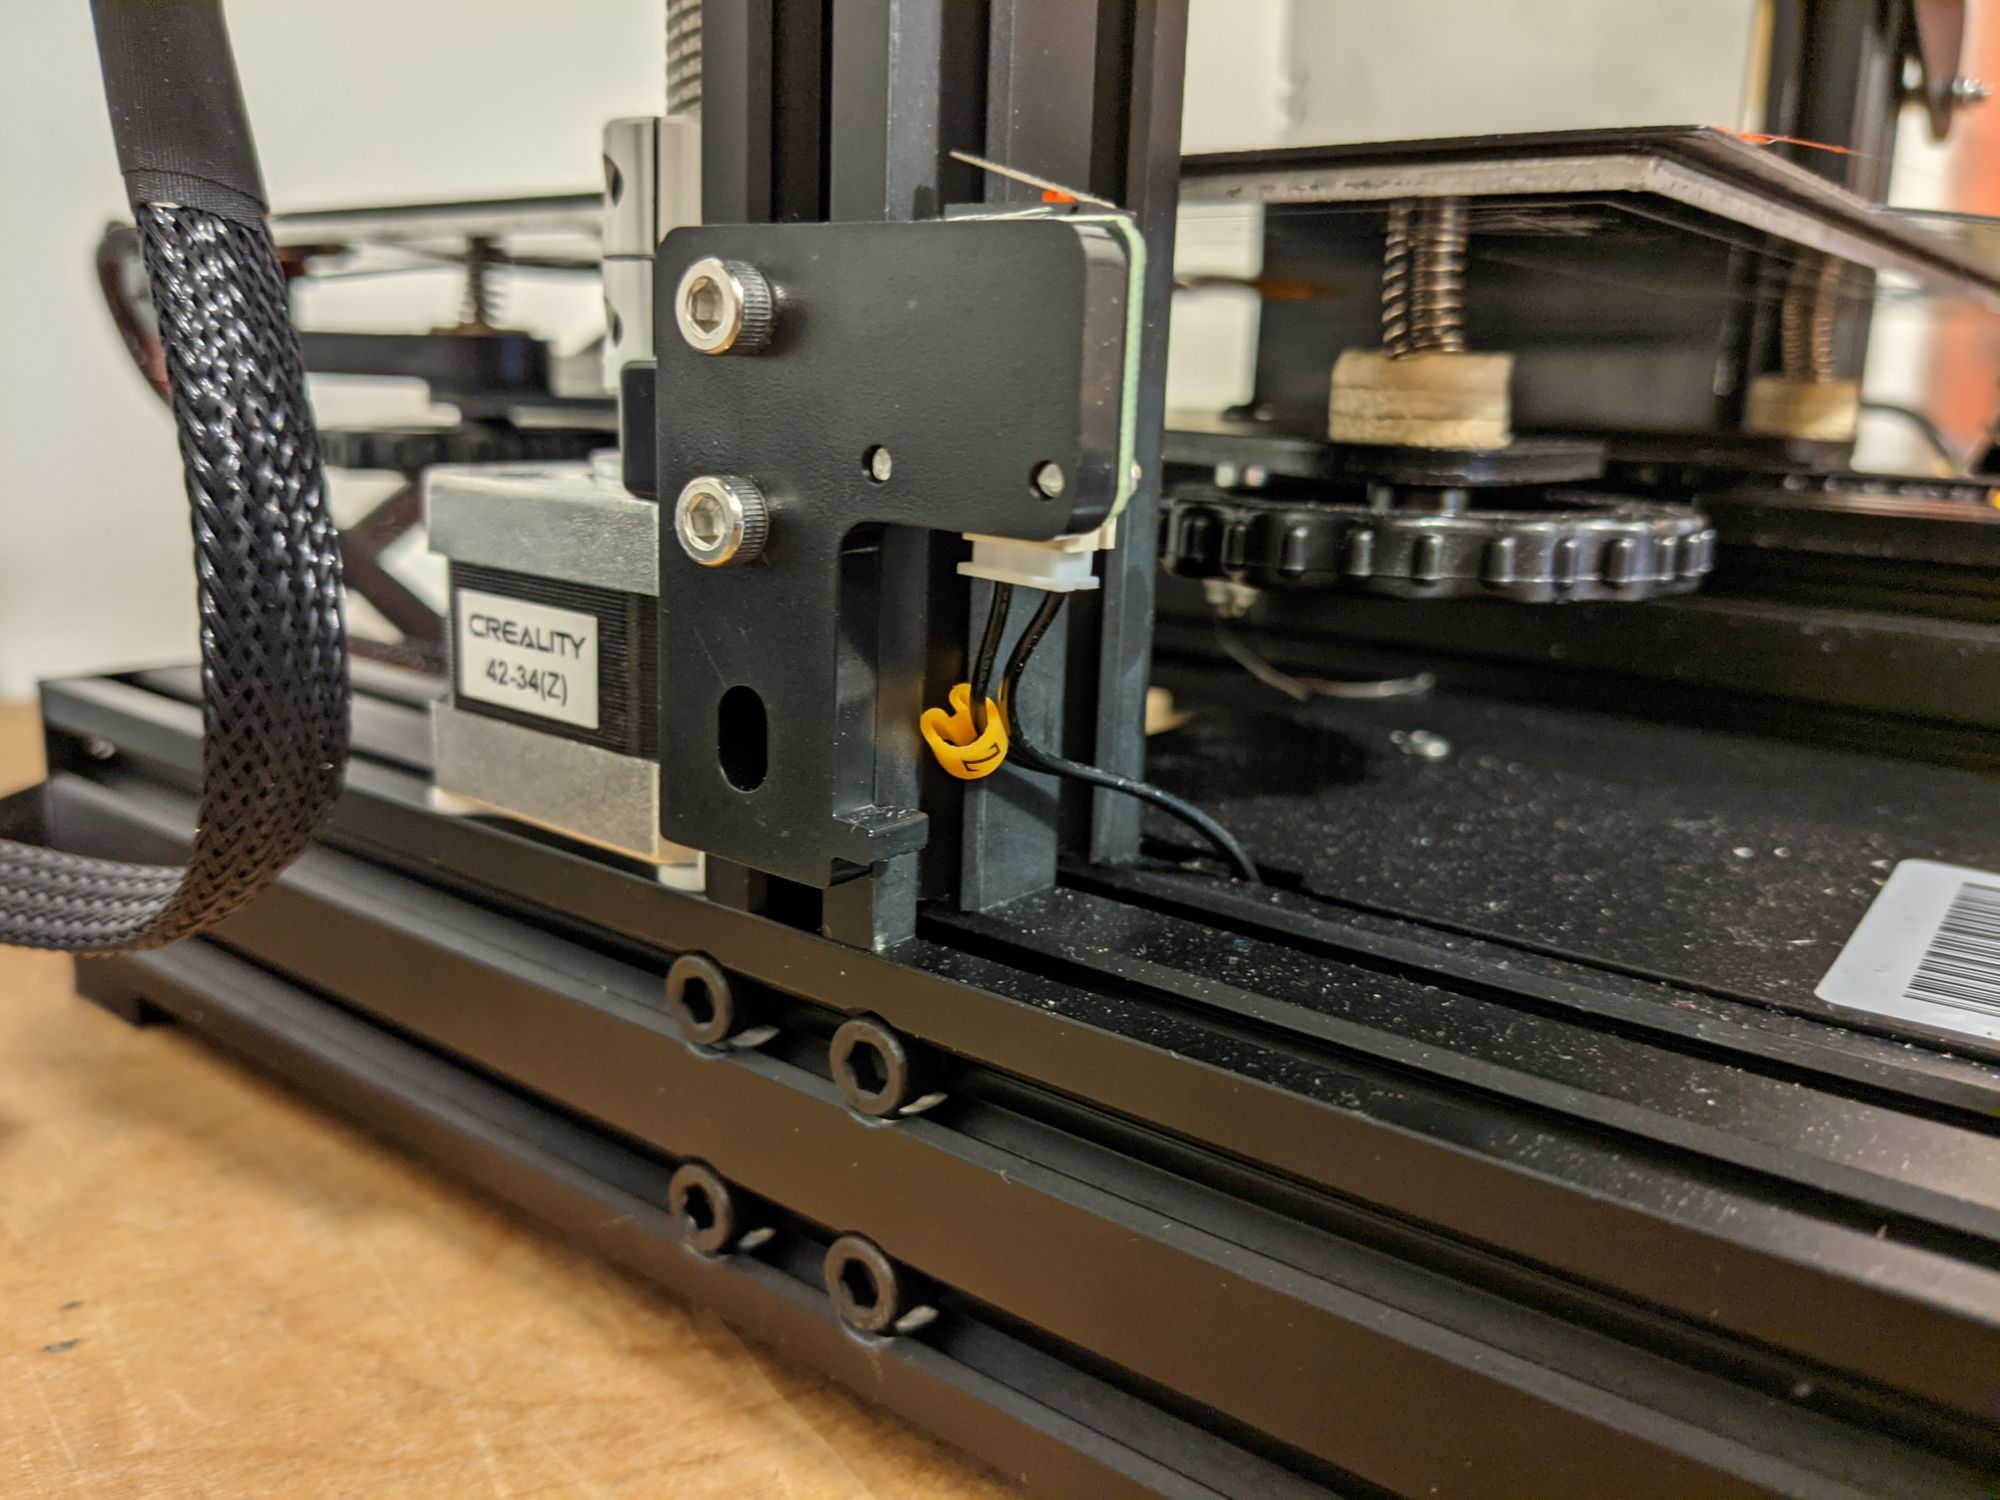
You can see in this picture that the whole end stop assembly is a distance above the default position of touching the bottom bar.
Once the Z end stop was tightened in place, I let the Z-axis zero on the end stop switch and used this new zero position to do a final level on the bed.
With that, the printer was calibrated and ready to use.