Sleep Timer - Building an IoT sleep training app
I wanted to make an IoT version of the gro-clock. A better sleep training device that you can control from your phone.

The Inspiration
I got the idea for this app from the gro-clock device which we used in the UK.
The idea is that you set a wake time and the device indicates progress towards that time and then changes to show that the wake time has been reached.
We used it with our toddlers. They were notorious for thinking that nap-time had ended a few minutes after it had begun or waking up at 5:00 am on a Saturday.
The Problem
The gro-clock was great, but it has a few shortcomings.
Setting it was a pain and we couldn't easily see how much time was left on it and we couldn't change it (eg. adding 20 minutes to a nap that took an extra 20 minutes to start) without sneaking back into the room and fiddling with the device.
The Solution
The idea I came up with, was to make my own IoT version that I could control with an app.
It would allow me to set it, monitor it and make changes to it, easily and remotely.
The Time & Opportunity
This project has been on my To-Do list for years. With a farm and a growing family, I haven't had the time or motivation.
Recently, that all changed because I joined an awesome startup called Commit. A crucial part of their onboarding process is that new engineering partners get to scratch an itch - a few days to exercise their creativity - demonstrate it to the team, open-source it, and then write about it.
When they told me that I could work on anything, I jumped at the chance to work on my sleep-timer project idea.
The Prototype
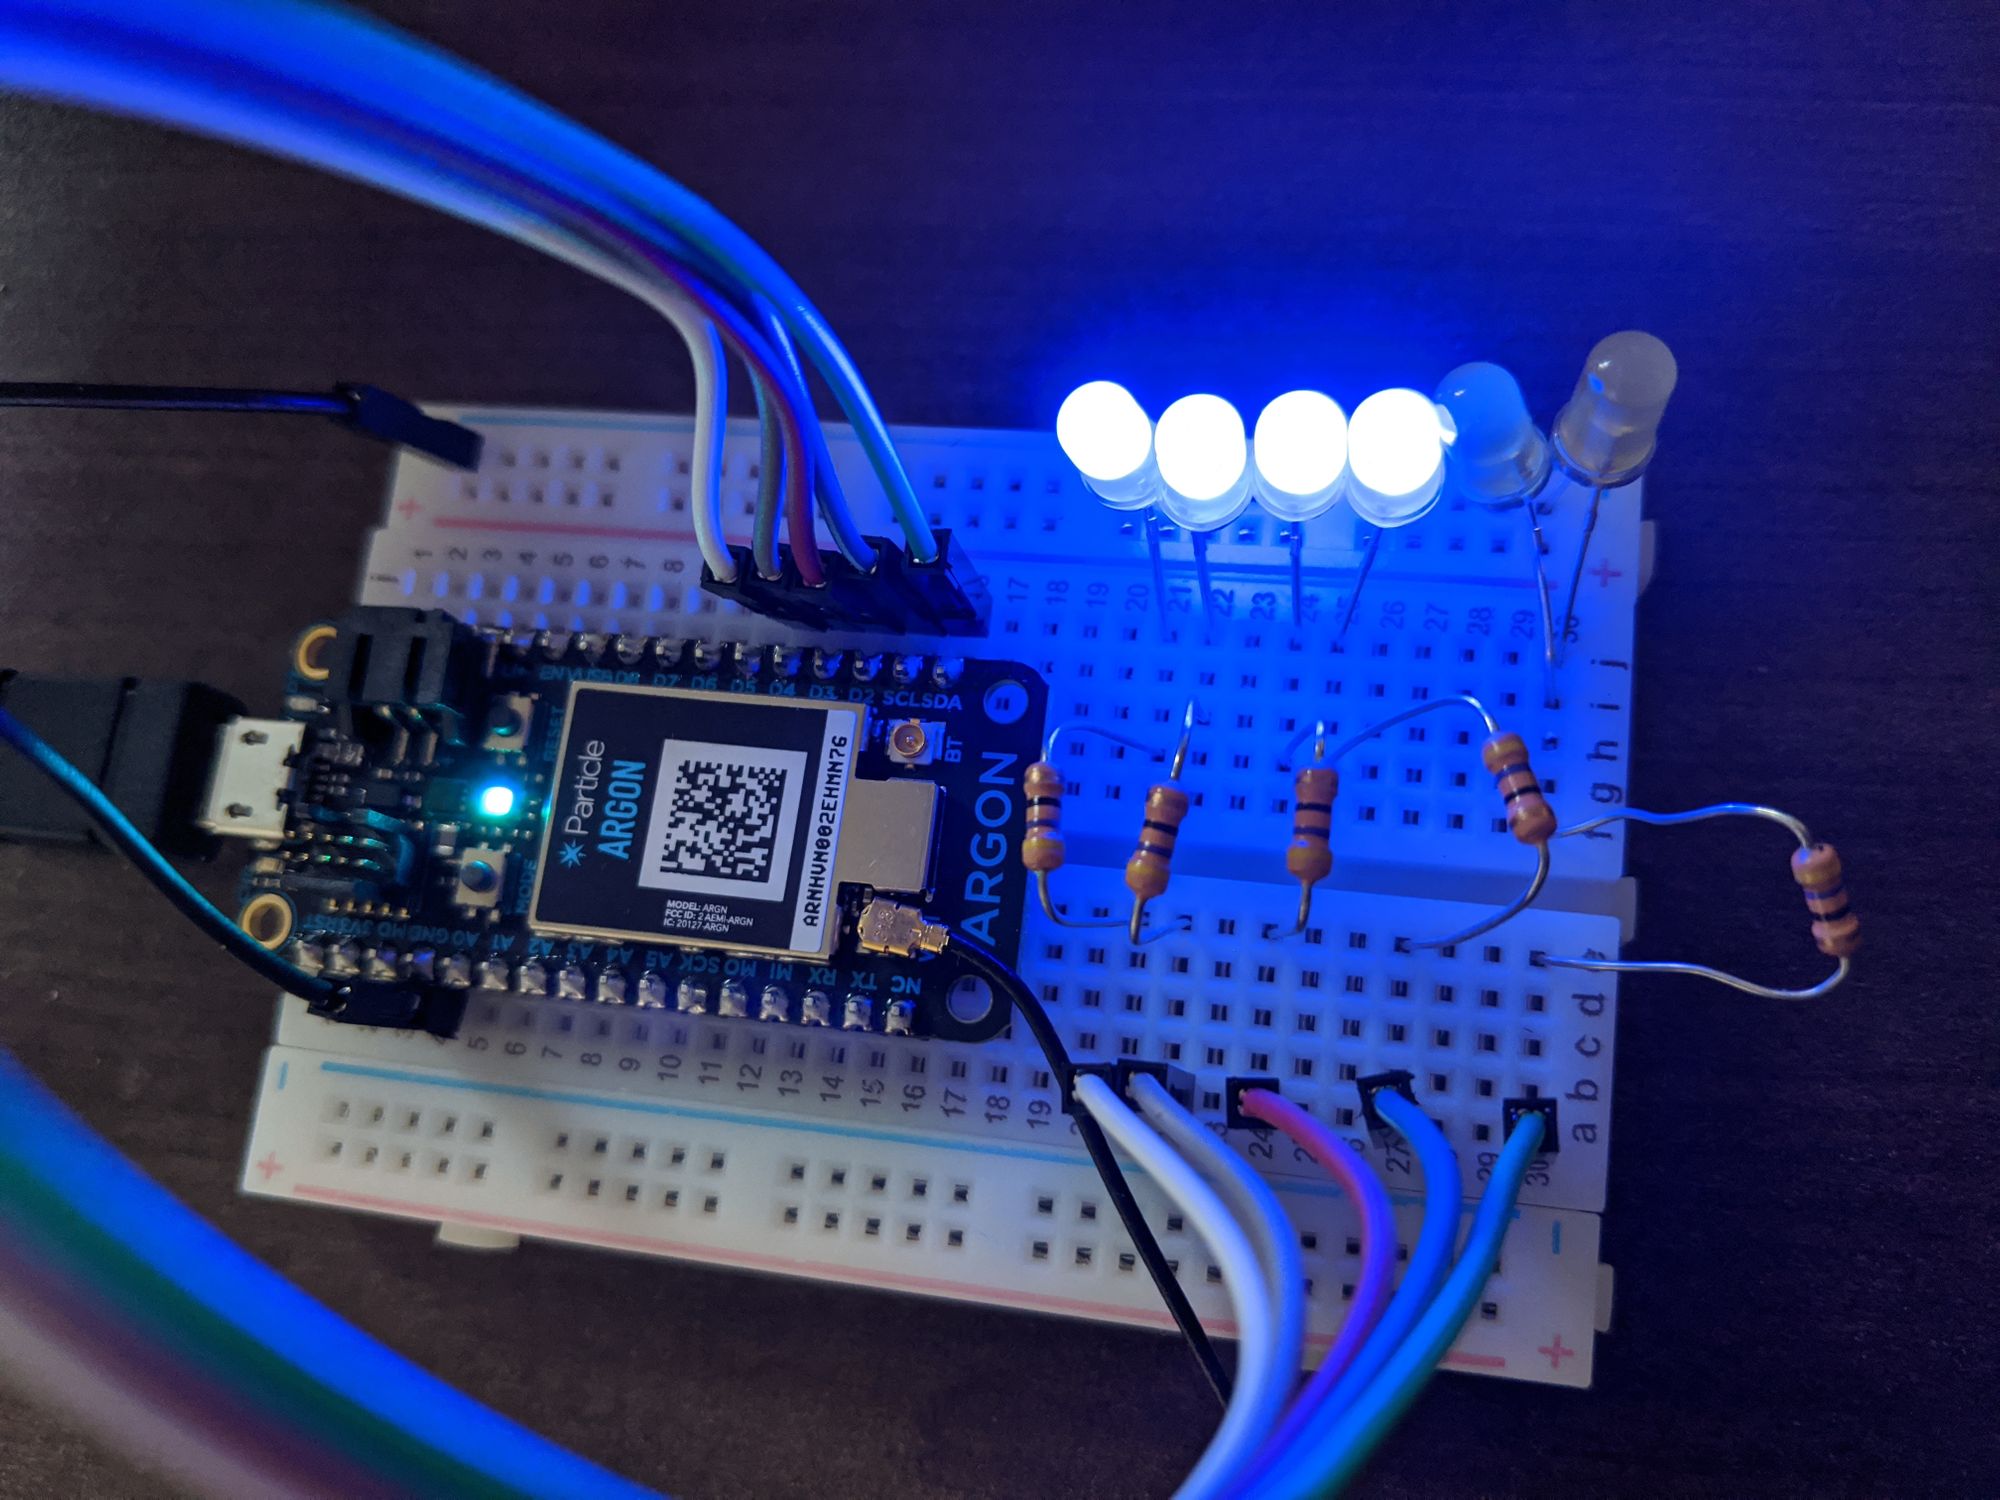
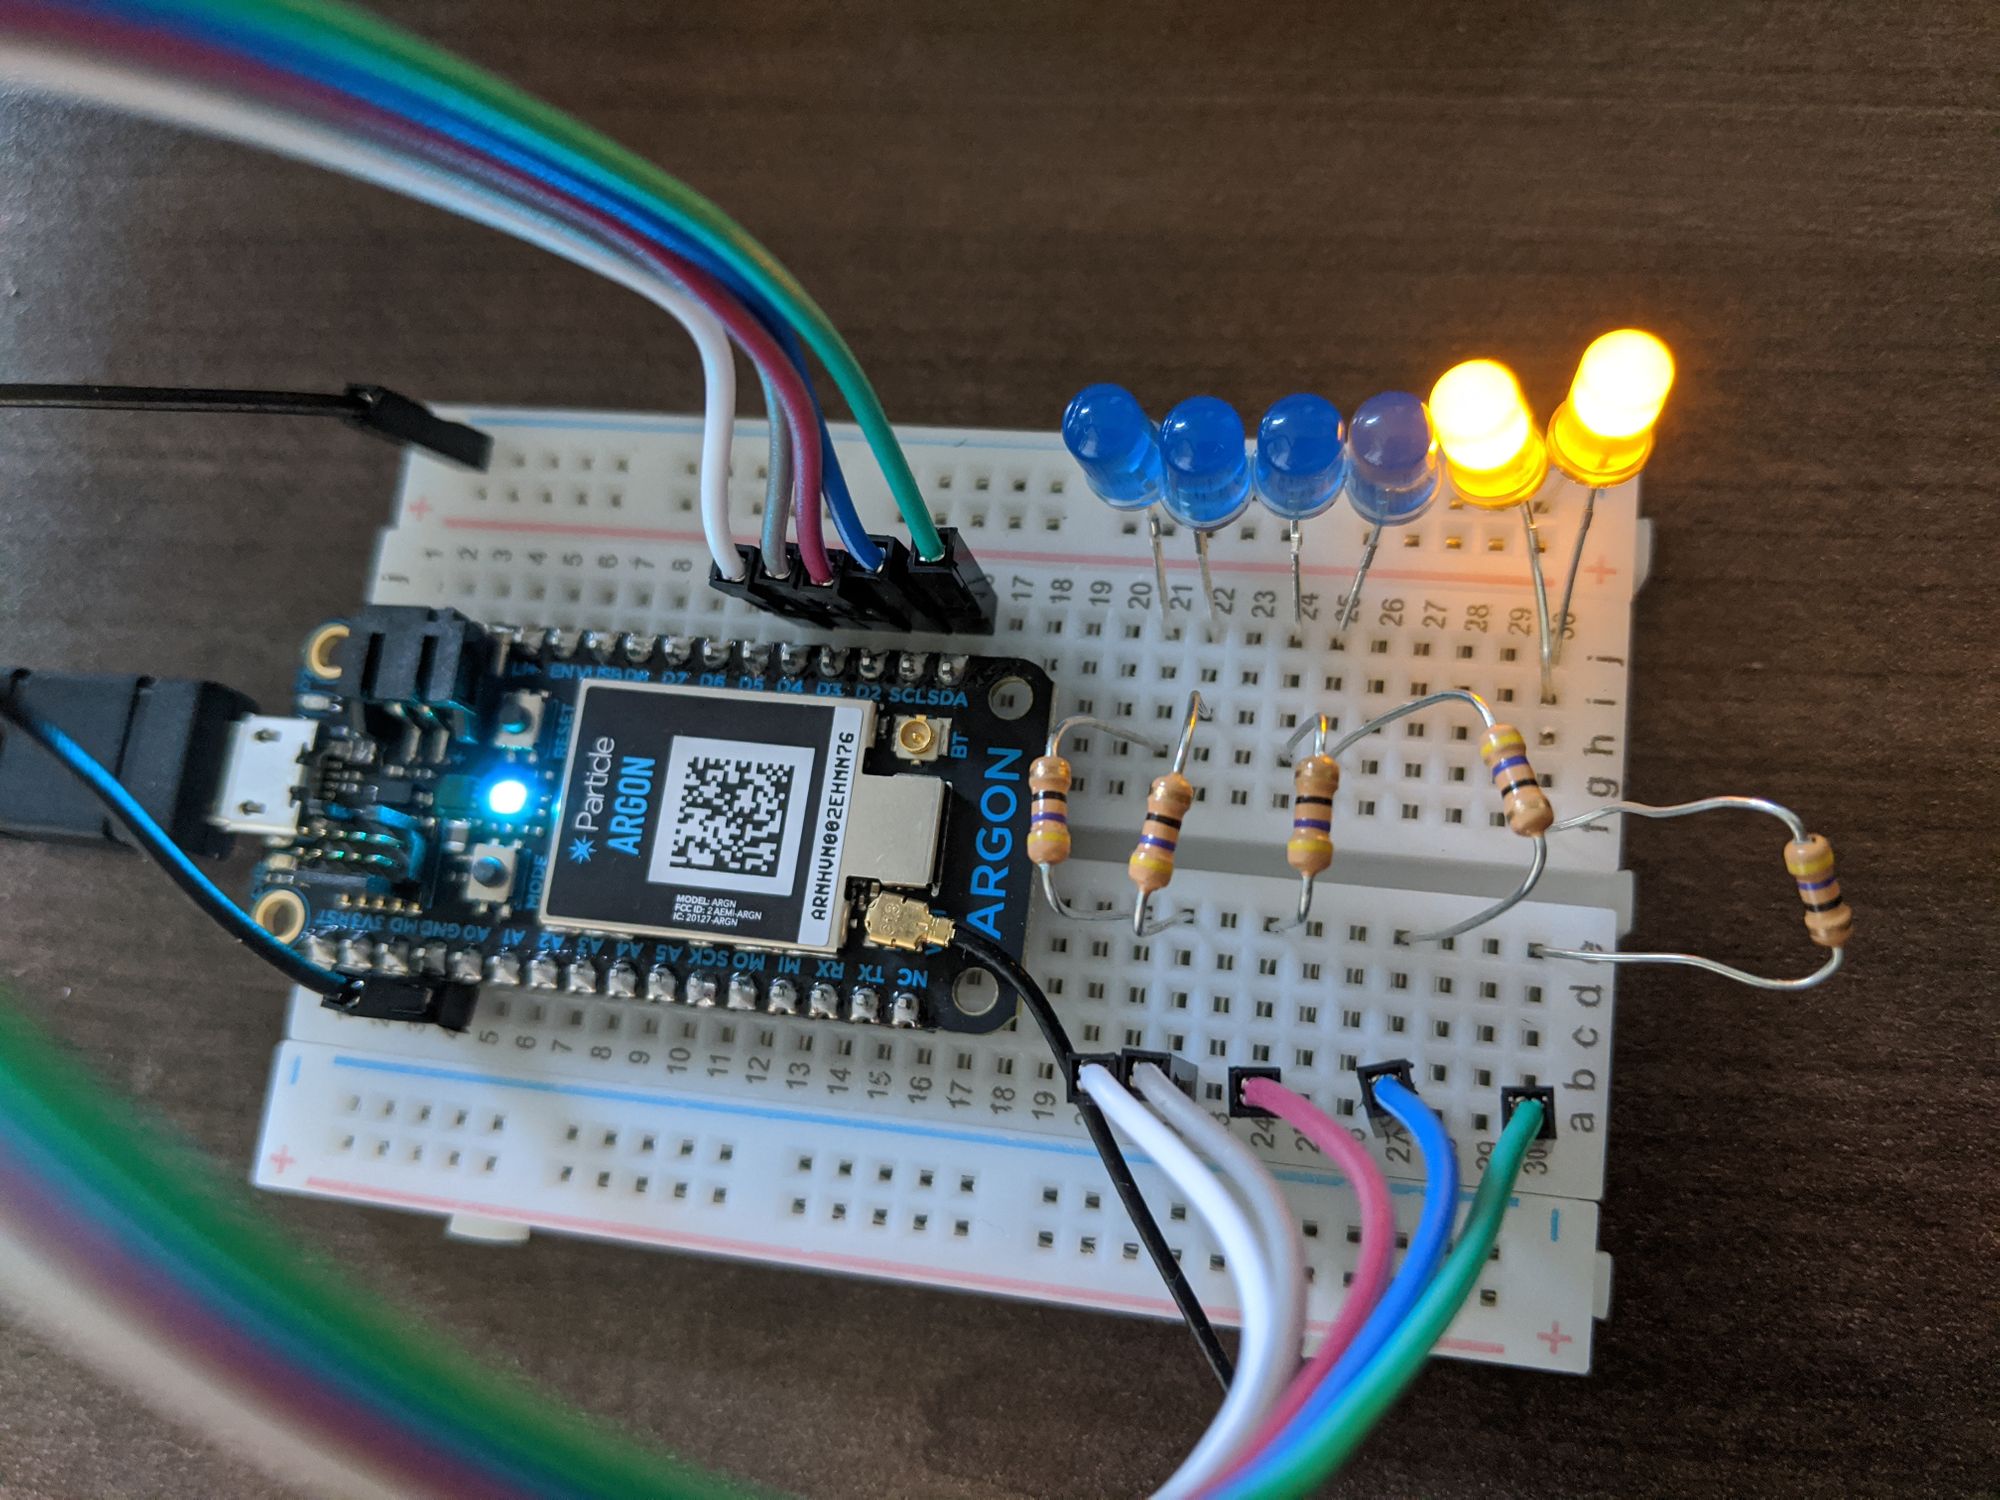
I initially made a paired down prototype of the device as a proof of concept.

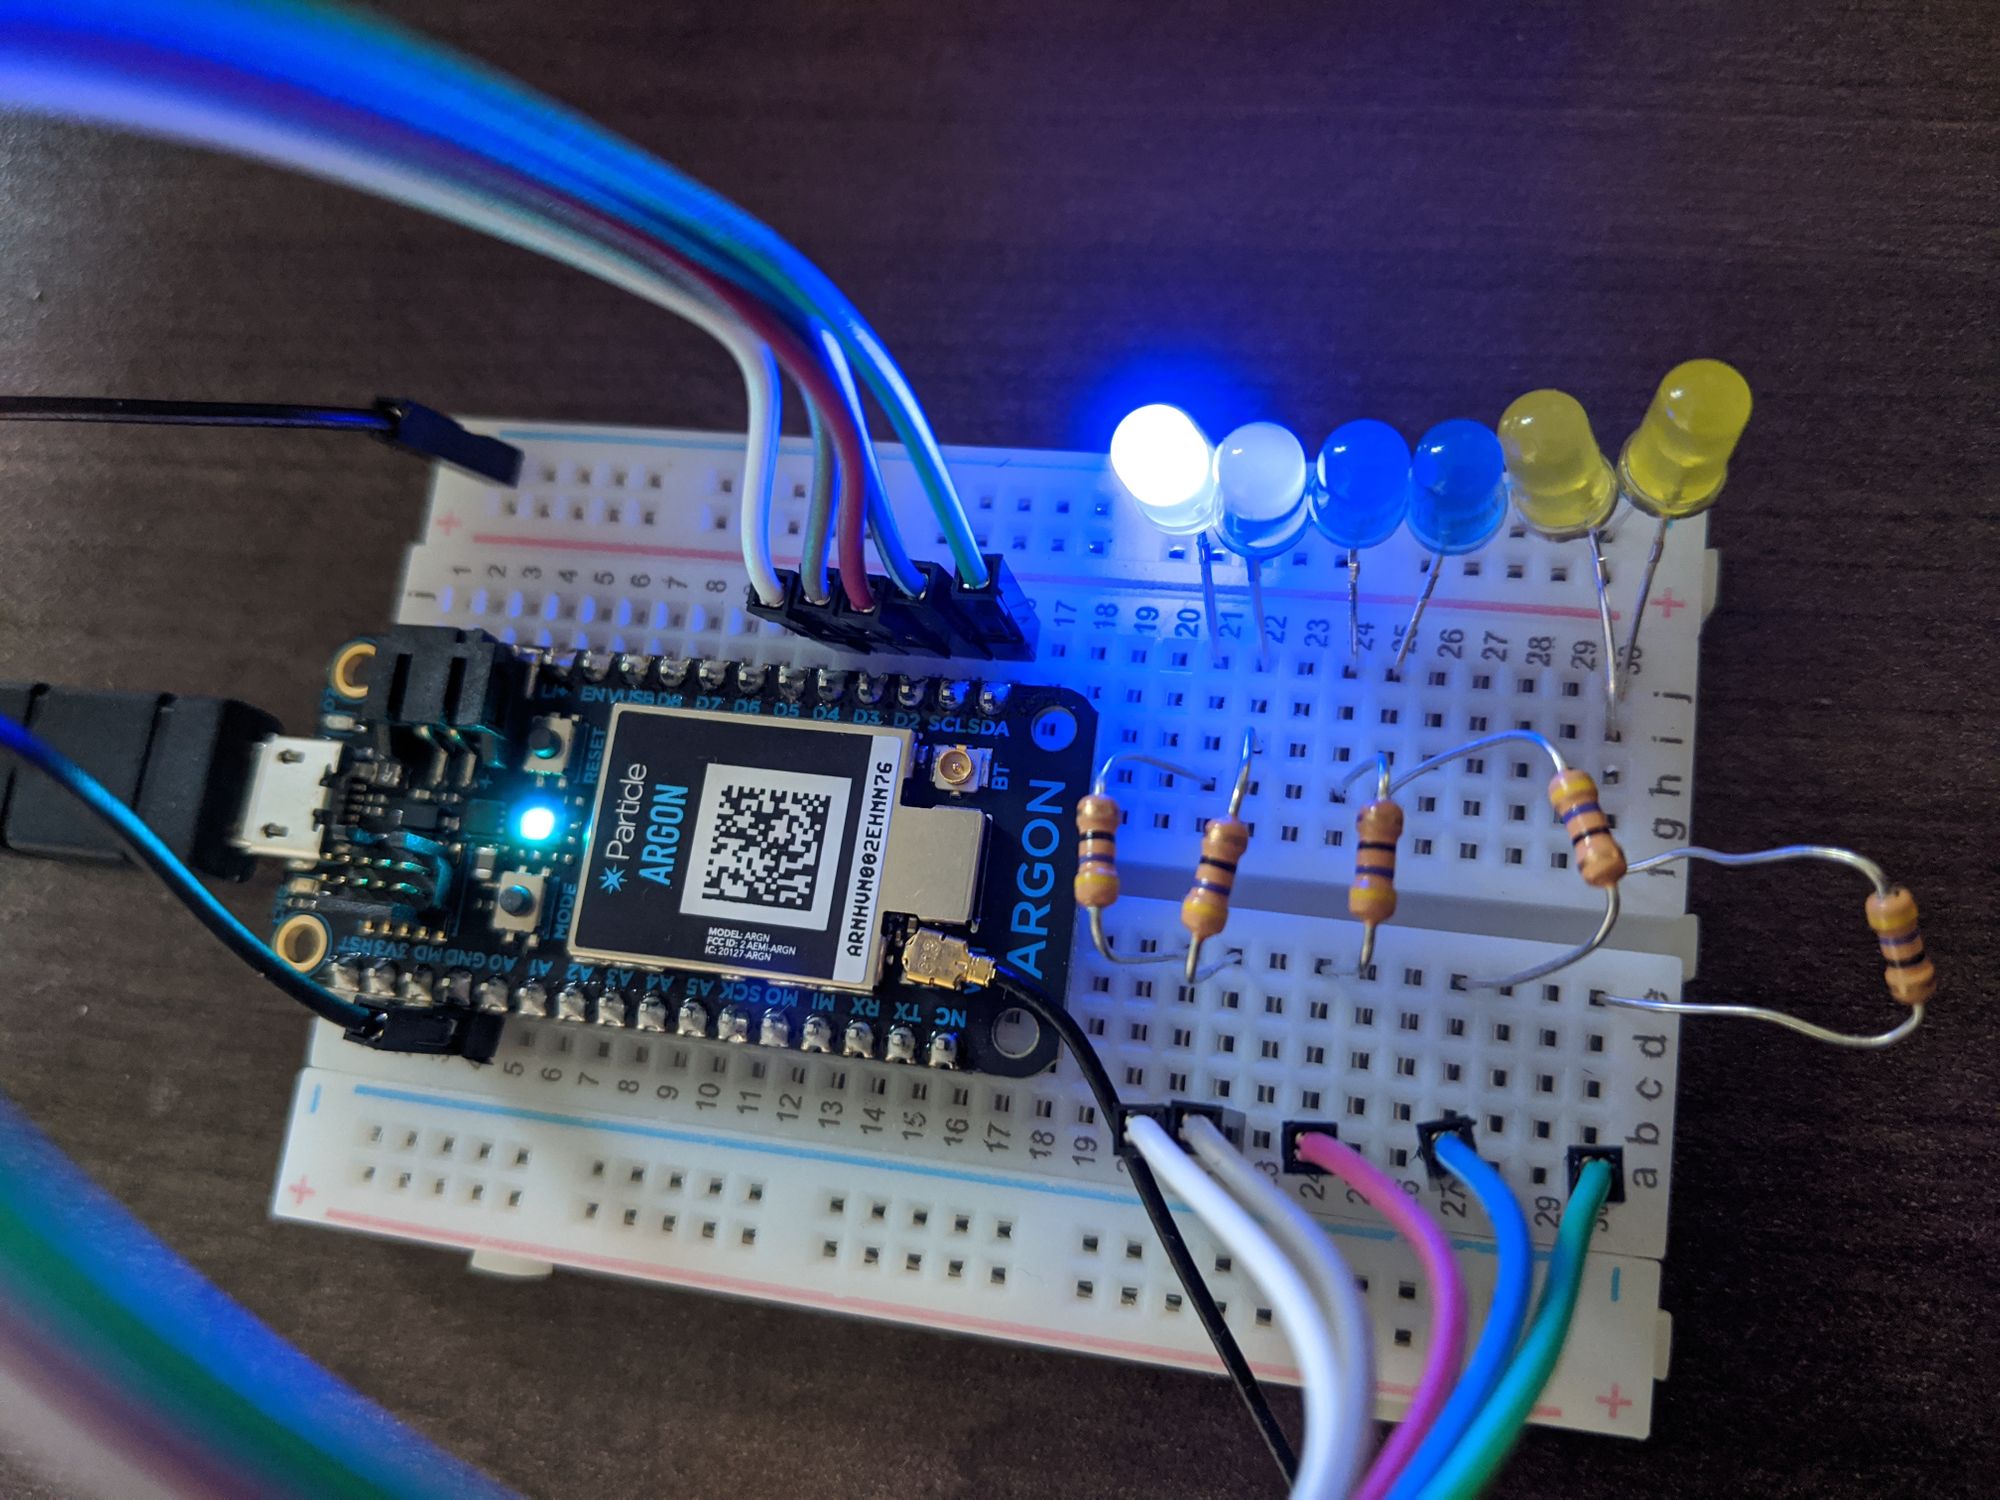
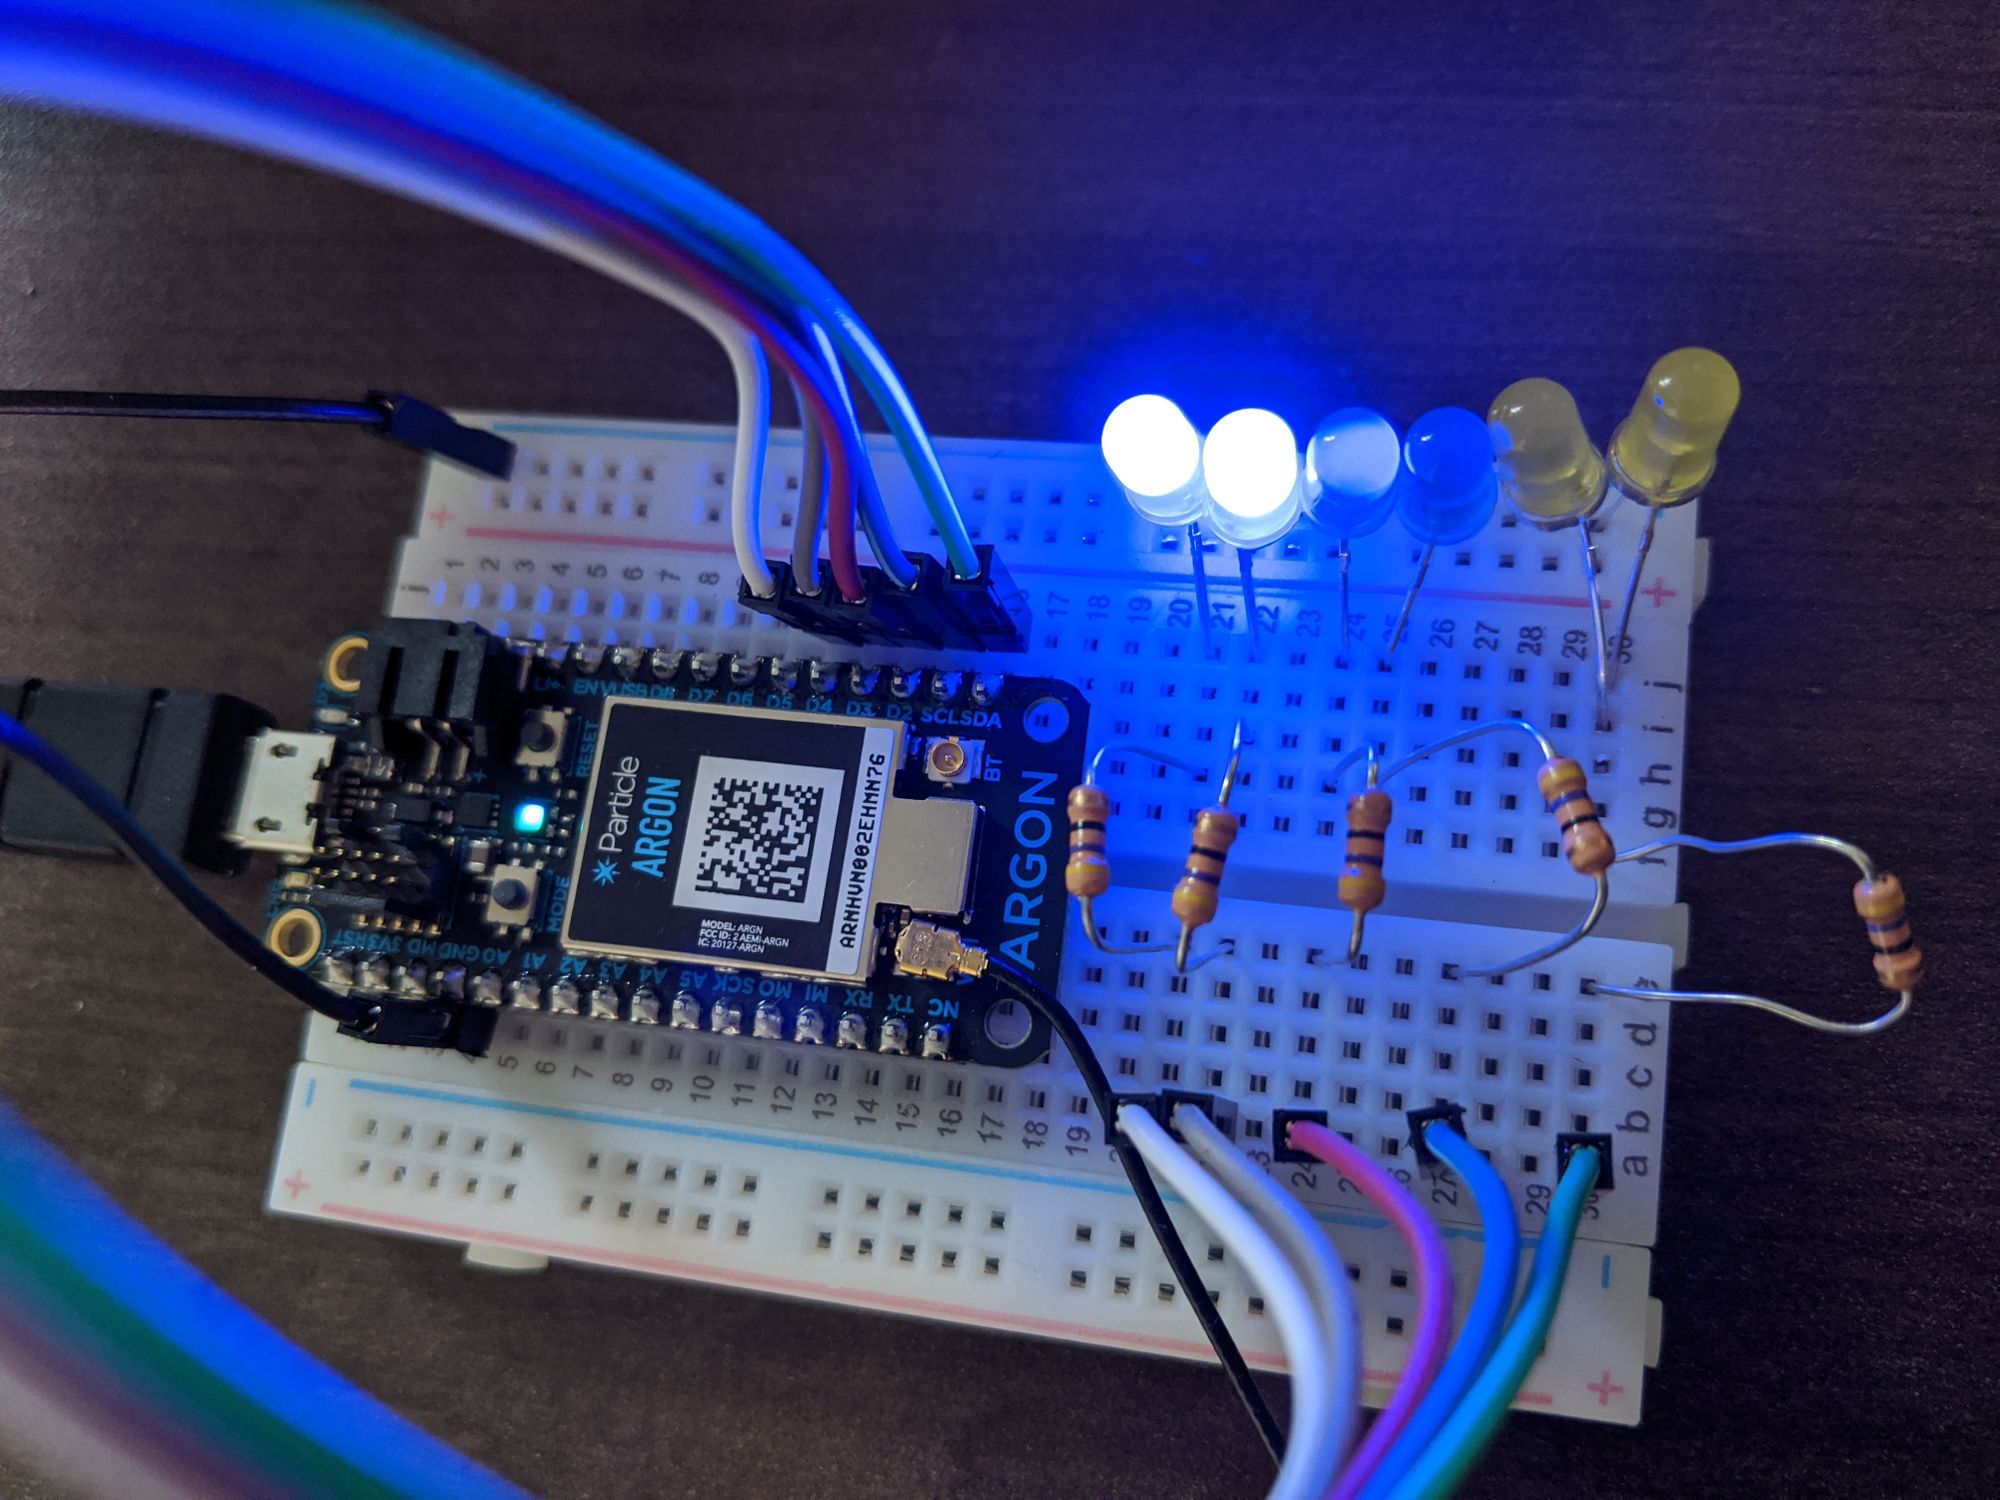
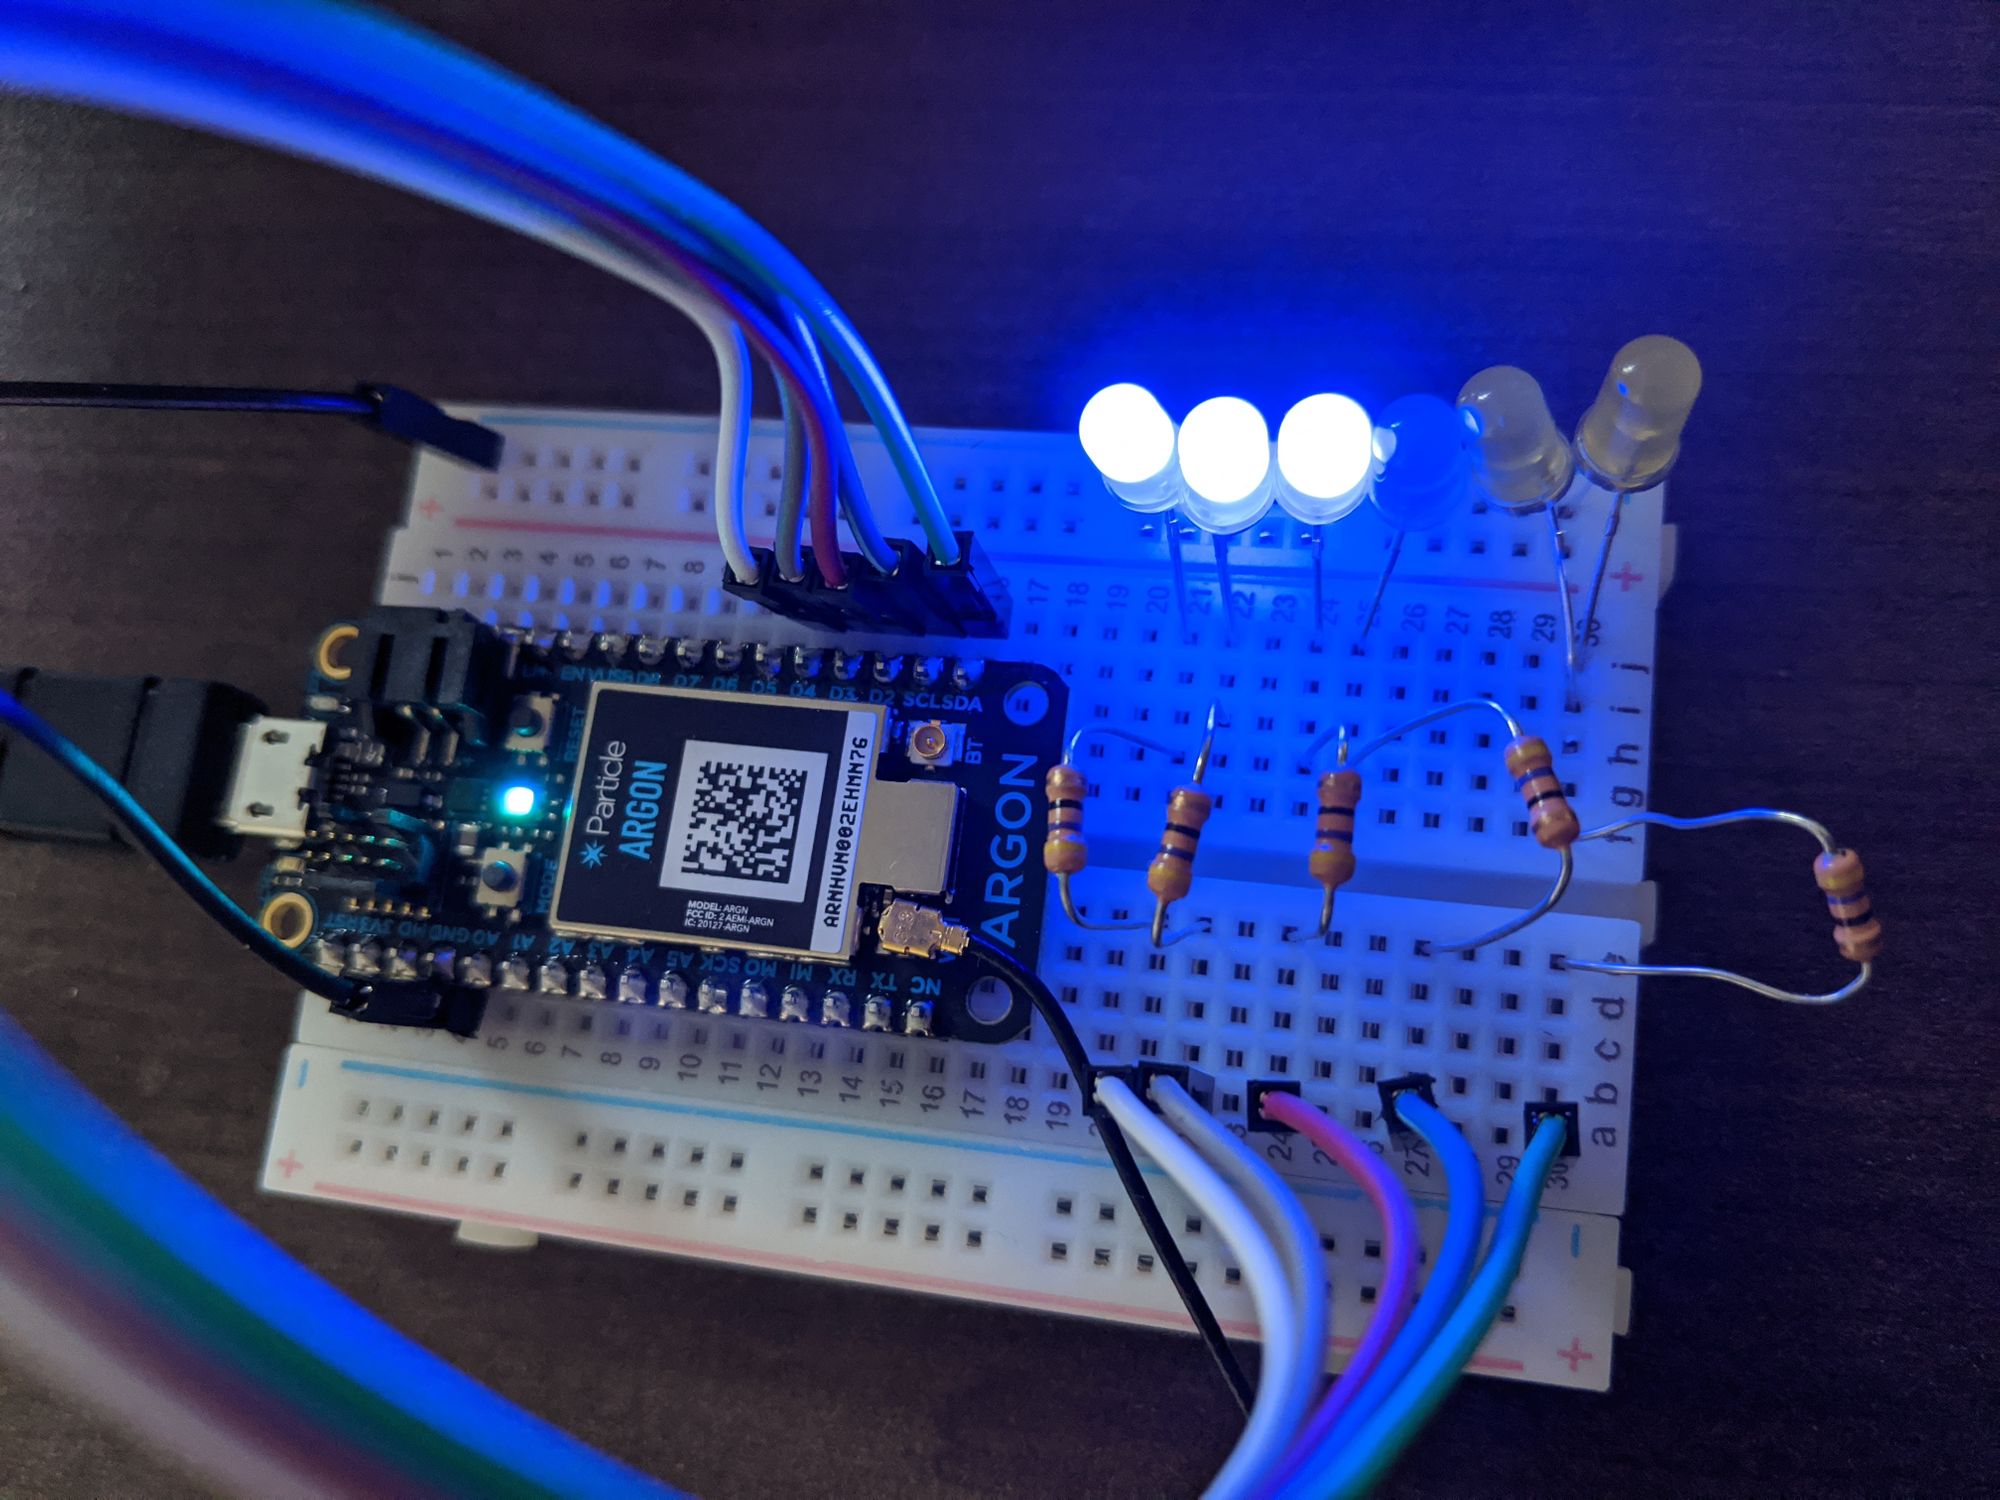
The device I used is a Particle Argon dev board.
I chose this board as the Internet side of IoT for this device was handled really well and the code is very similar to Arduino code which I was already familiar with. All the requests to and from the device are handled over HTTPS and Particle has a very tidy Cloud API that allows for the interaction with code on the board via their RESTful API.
For the first version, I added some simple code to control some LEDs and then added some functions to allow me to set and reset an end time and let the device handle the actual timing and controlling of the LEDs.
For initial testing, I used the particle.io device console web app.
Device Development Phase 2
Moving on from the proof of concept, a few more functions were added, like a function to return a JSON string of the complete device state and a function to instantly end the sleep period.
The final version of the device code is available on GitHub.
With the code done, I wanted a more user-friendly design than a dev board with some LEDs poking out.
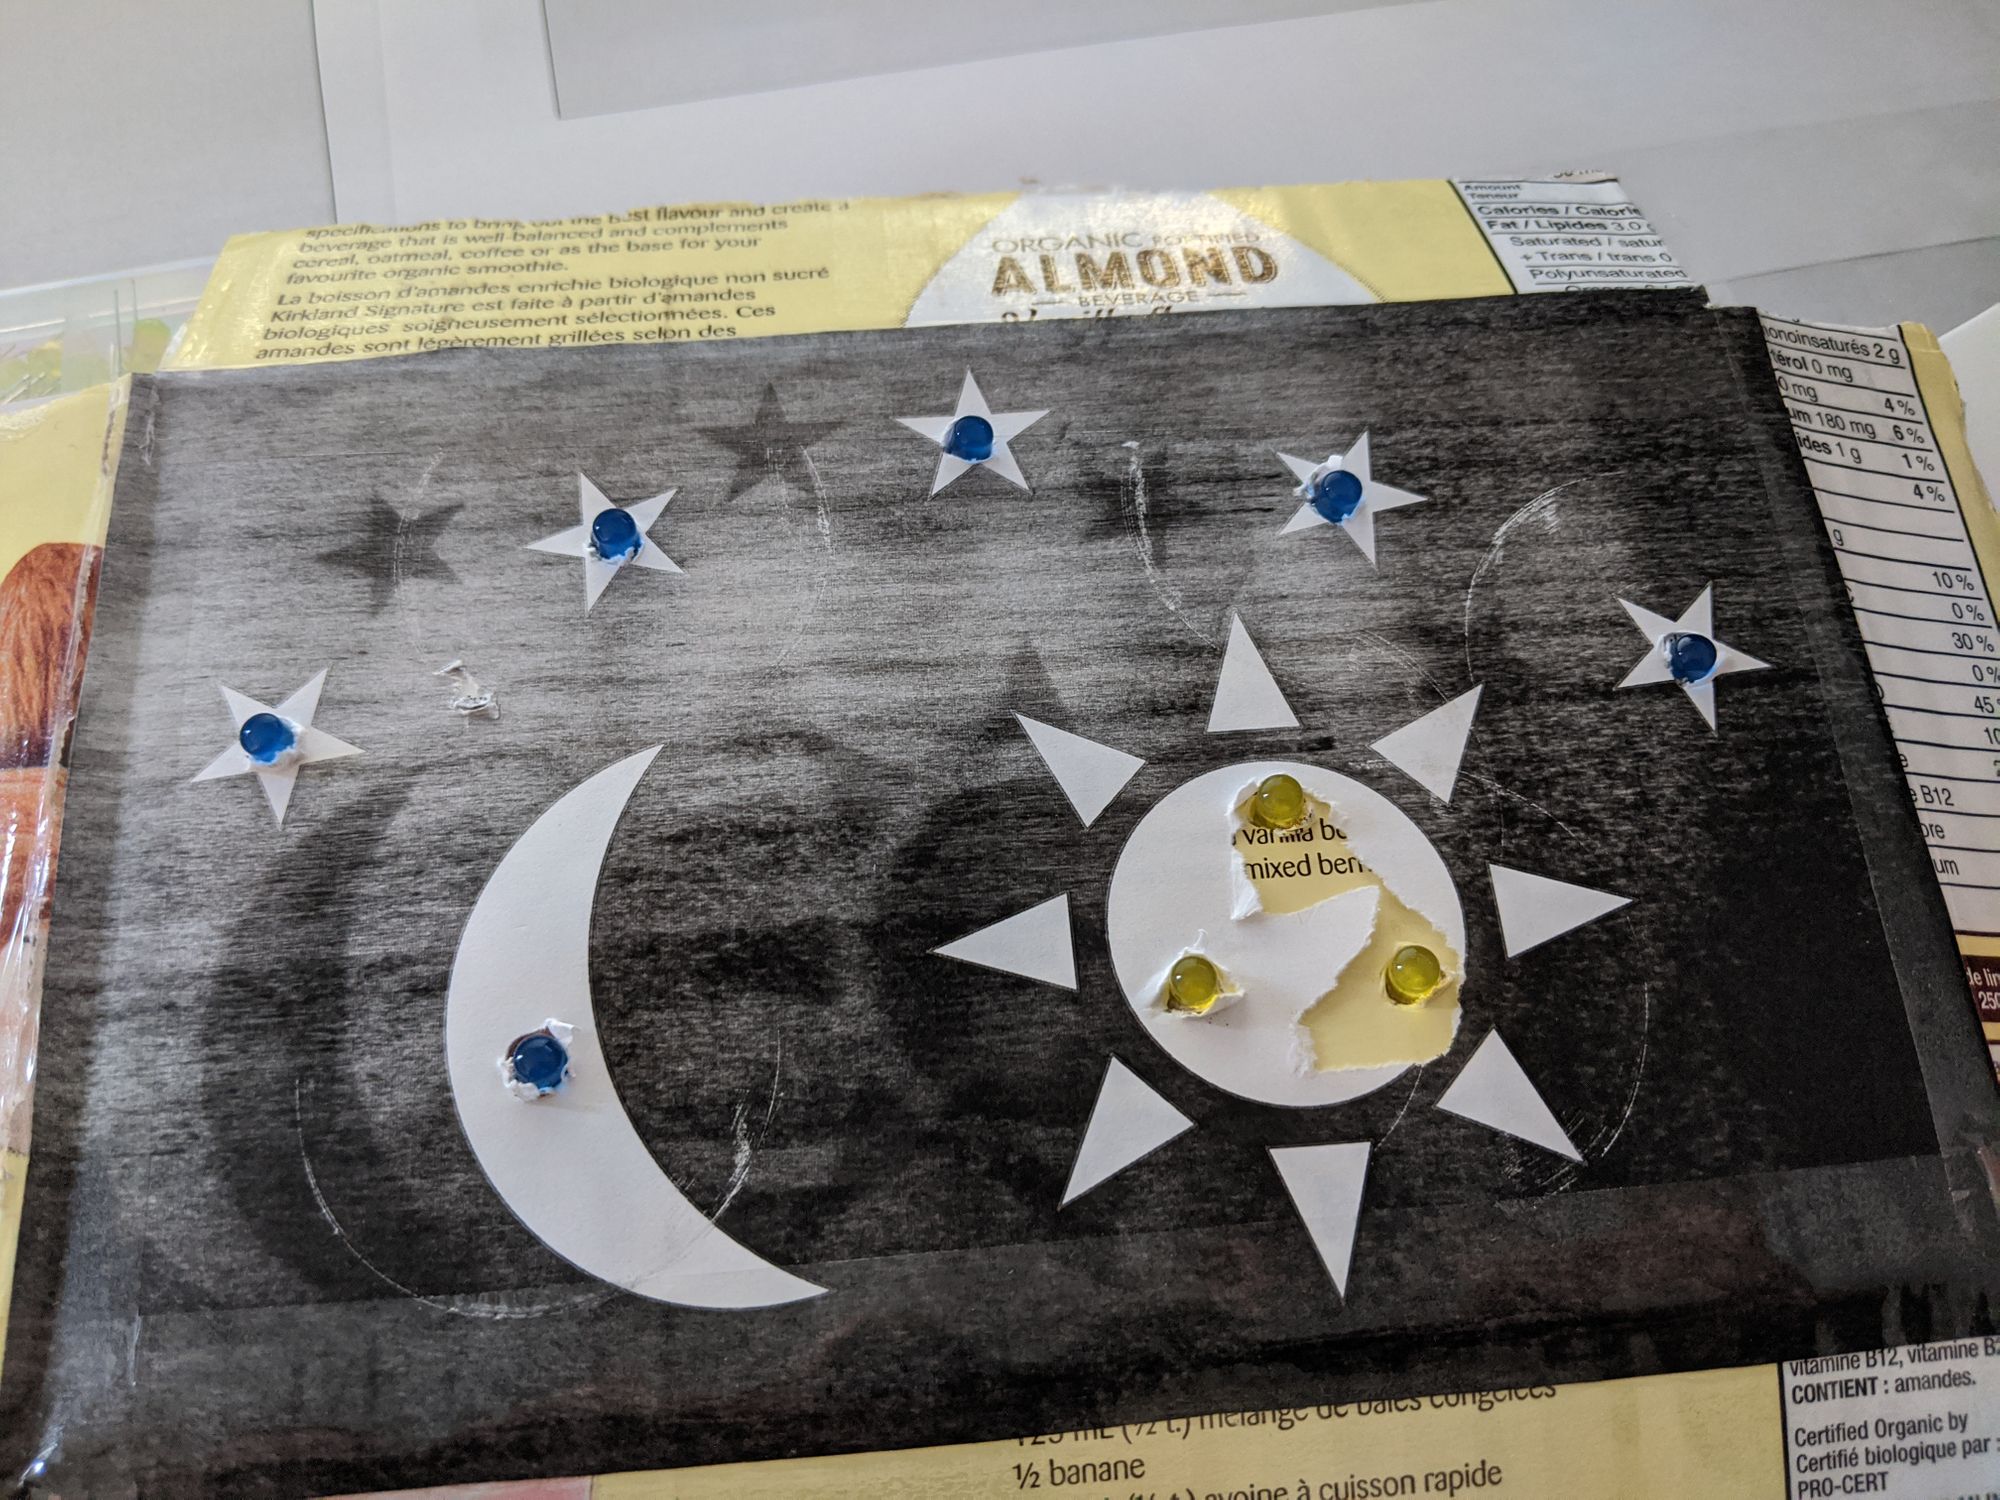
I mocked up a quick image to use as a template.
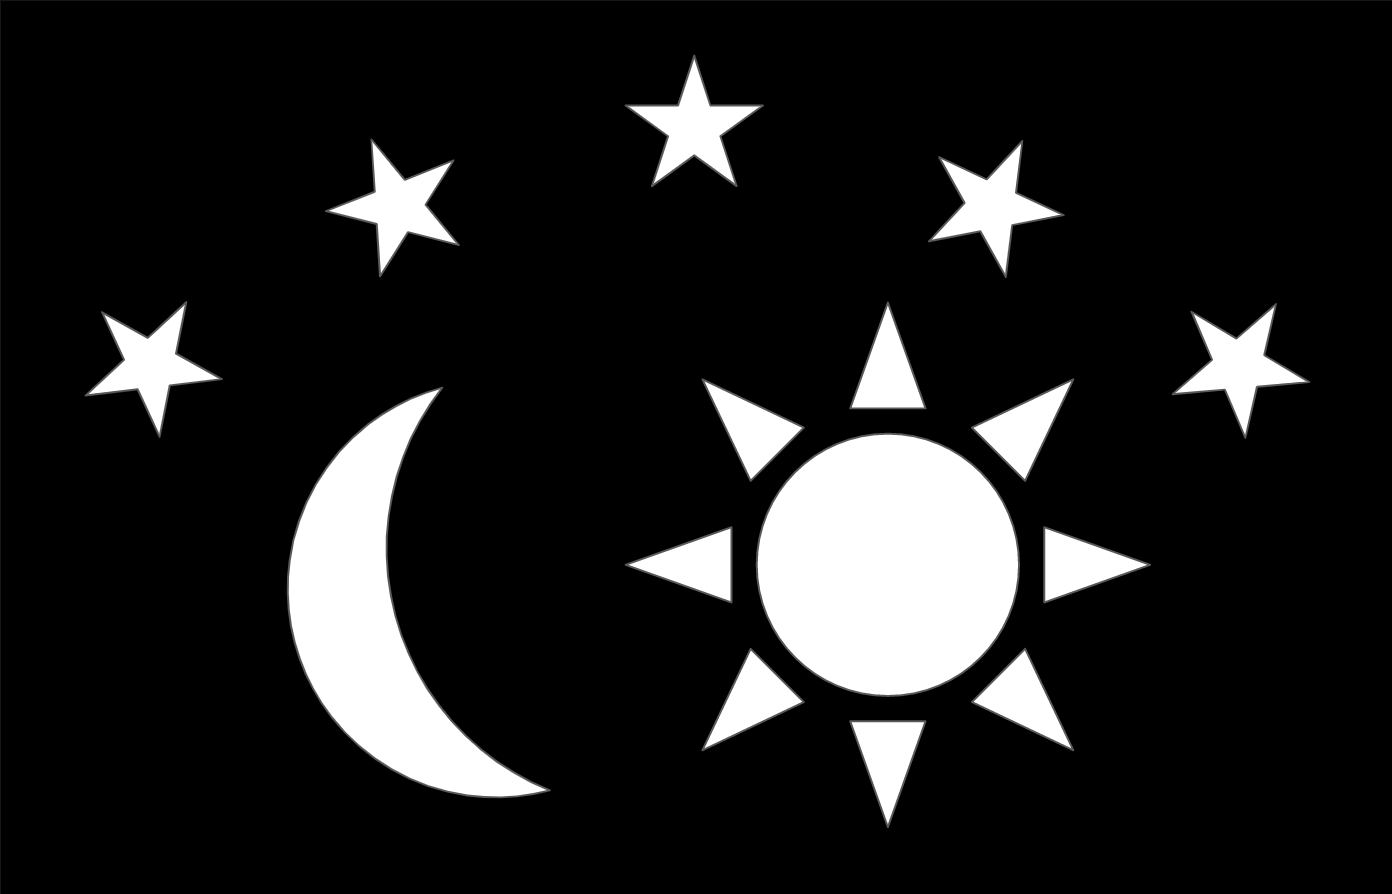
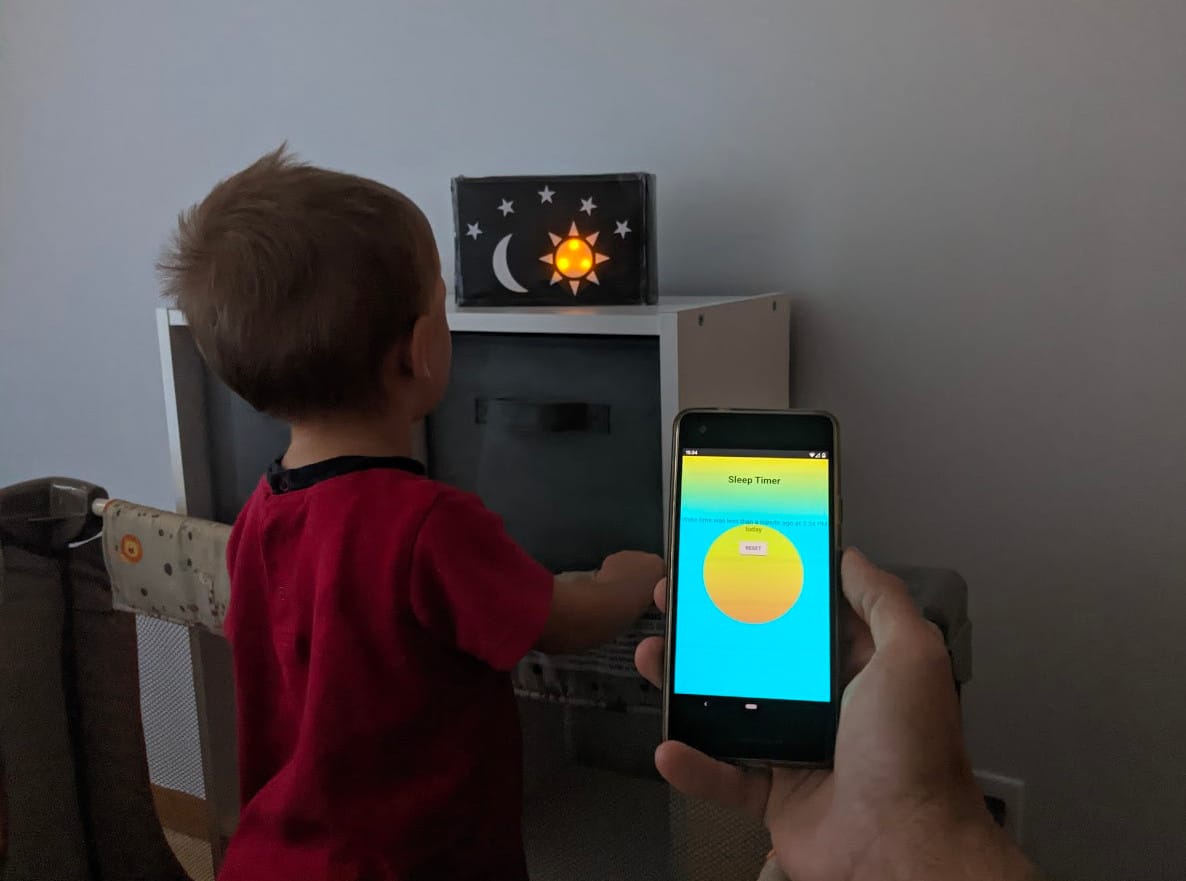
The idea was to put LEDs behind the stars, moon and sun to show the progression of the sleep period and the wake state.
I found an old cookie box that I used to make a housing for the device.
I used a failed template print as a guide for placing the LEDs. I stuck the template to a piece of cardboard and made holes for the LEDs.
I glued the LEDs in place and then soldered the cathodes (negative sides) together and wired them all back up to the dev board.
For more information on the wiring of the LEDs, see the ReadMe on the GitHub page for this project.

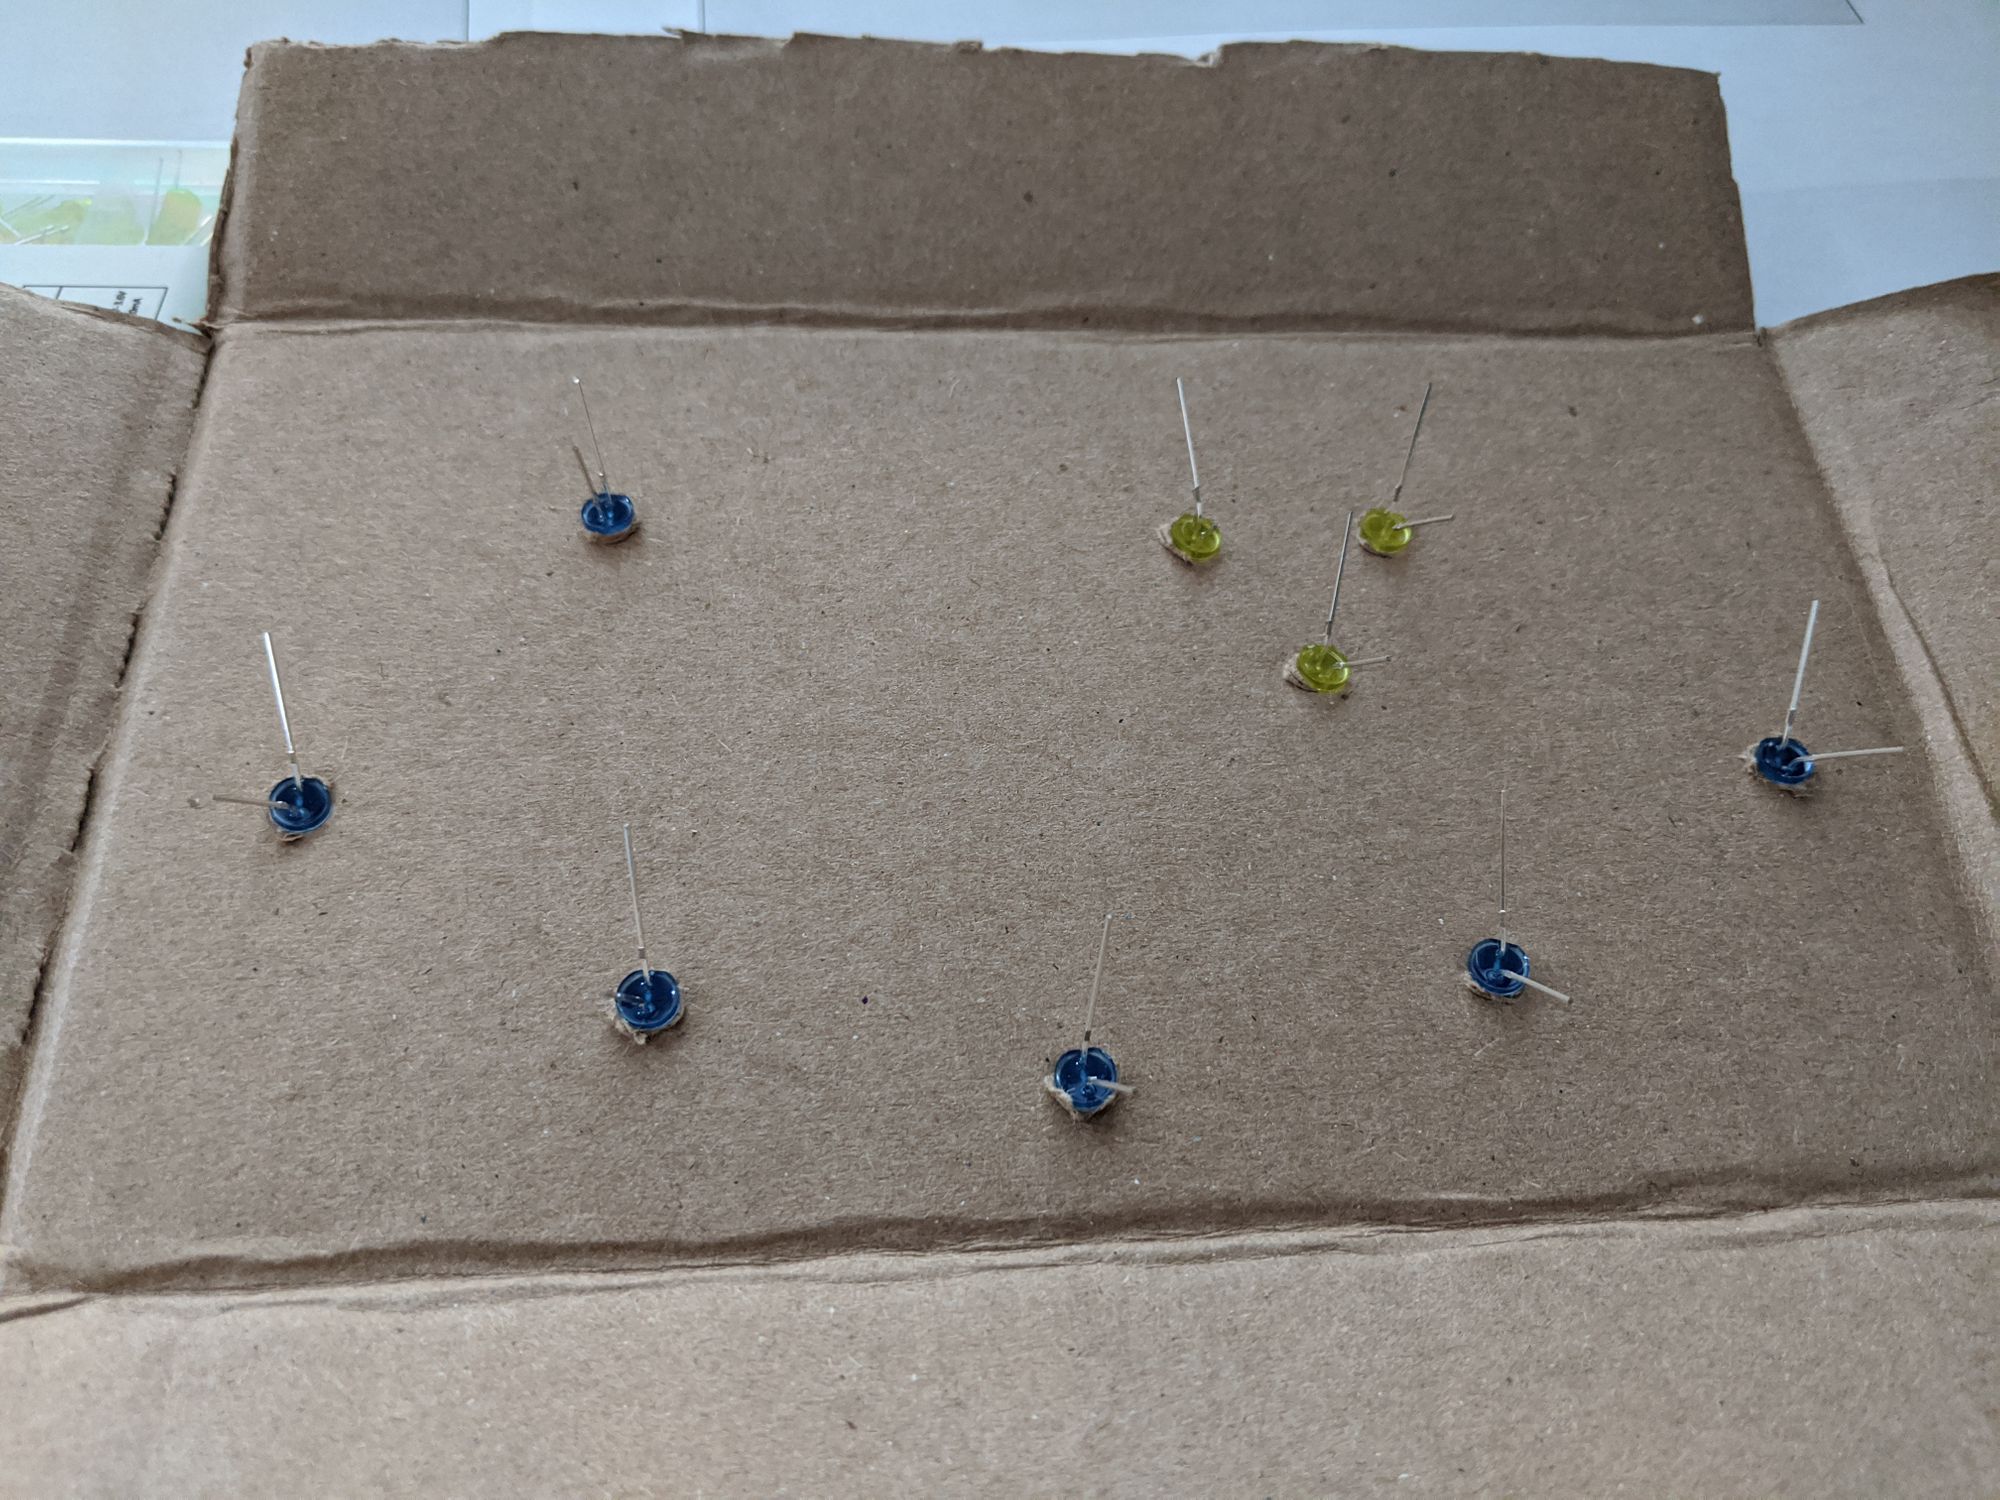
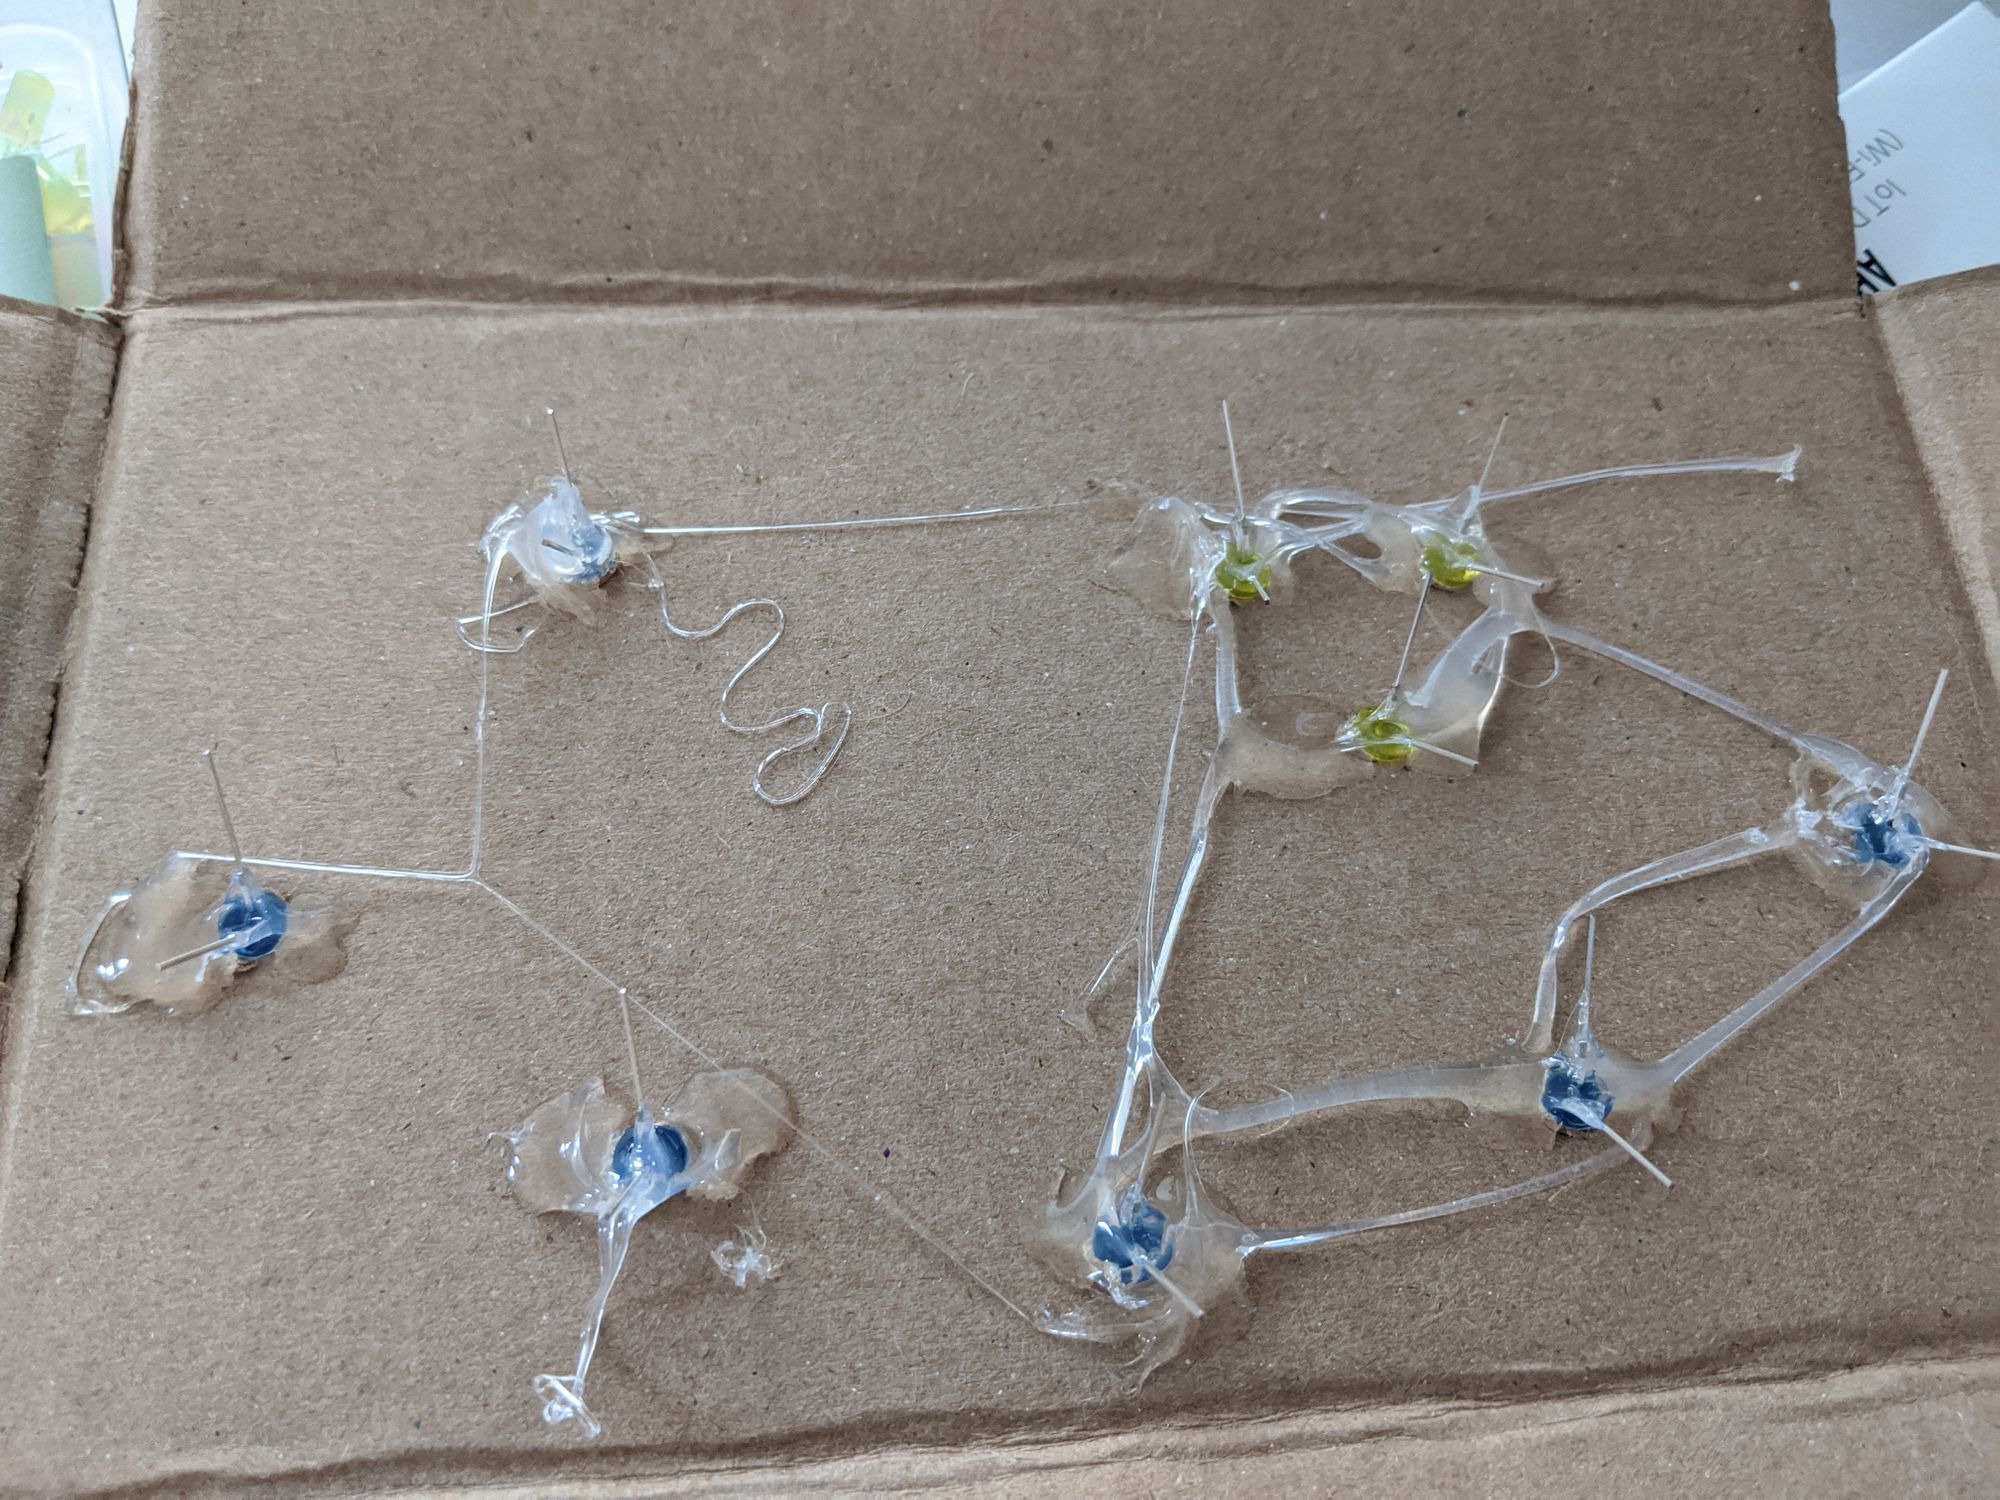

I placed this LED spacer inside of the box.
I cut the front of the box off and placed the template onto the opening so that it would line up with the cardboard insert inside.
This was the result:
The App
The next step was to make an app that could be used to control the device.
For speed, I decided to use ReactJs web app as I was already familiar with this kind of software development.
I also opted for using Material-UI components where possible to speed up development and to make the app more mobile friendly.
My idea was to have the device drive the state of the app.
Here is a short video demo showing how the app works.
On load, the app contacts the device to get the current state and will route to the relevant page automatically.
Each state has its own theme; dusk for the "Ready" state, night time for the "Timing" state and morning/day time for the "Done" state.
Every time the user submits an action to change the device state, the app will follow up with query for the new app state and drive the page routing from that new state. In that way, the device state is always the single source of truth.
I added a fun animated moon and sun to add some character to the app. This was something fairly new to me. I found an example of making a circular div online and took it from there.
One thing to mention is that in the "Ready" state, I wanted to make sure that the users had the option to either make the device sleep until a certain time or for it to sleep for a certain period. This is to differentiate between the night time sleep where the wake up time is a set time, for example 6:00 am vs the afternoon naps where the start time might vary, but the duration of the nap is the target, like nap for 1 hour. So I differentiated these with the concepts of "Sleep Until" and "Nap For".
The source code for the app is also on Github. Along with instructions of how to install and run the code for yourself.
Deployment
For deploying the app, I am going to compile the ReactJs code to static HTML, JavaScript and CSS assets using the the build command (specified in the ReadMe file on GitHub) and host it on one of my low powered home PCs as a mini-server.
This early version has my login credentials hardcoded in one of the non-tracked files, so the server should not be accessible outside of my private network.
Future Work
Some ideas of what could be added to improve this project:
- Notifications when the sleep time has been reached
- PWM LED control for gradual transitions
- OAuth login to remove hardcoded credentials and allow it to be internet facing