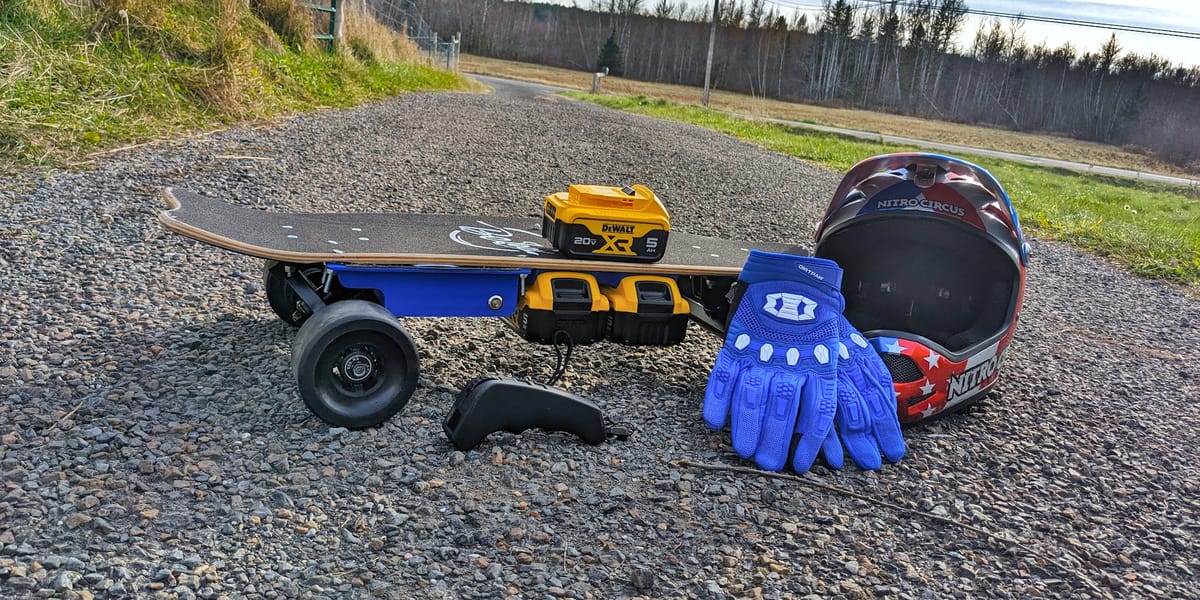
Building a DIY electric skateboard, powered by drill batteries
I was hung up on not being ready to make my own Li-Ion pack, but when I realized I could just use the batteries from my drill, the project was a go.

The Idea
Somehow, I stumbled upon this video on YouTube.
I had known about electric skateboards, but I did not know about the DIY part of it, and that got me hooked.
I started looking into electric longboards, moved onto electric mountainboards, DIY Onewheels and then eventually onto electric motorcycles.
This was all theoretical, I love the learning process almost as much as the building process.
For various personal reasons I was going to put off actually building an electric longboard for a while as I wanted to make my own batteries. The battery packs are the most overpriced parts of an electric skateboard.
For example, right now, a 12S4P battery pack on Mboards.co costs $574.99 USD. The cells for that pack cost $5.99 USD each, so at 48 cells, it would cost $287.52 USD for the cells which are the most expensive part of the pack. Sure there is a lot of labour involved, but as a Maker, I would want to put in the labour myself, so making my own was a no-brainer. Even still, I wasn't quite ready to get set up with a spot welder to make my own packs. So that was the main reason that I was putting it off.
I was just about to shelve the idea of making my own board when I started to brainstorm other ways of getting batteries, like maybe getting the LiPo batteries now that I would need to power a KWeld spot welder in the future. Those were also pretty expensive.
Then I had the realization that I already had a bunch of Li-Ion packs sitting around in the form of my DeWalt 20V drill batteries.
The Batteries
Doing some further digging, I discovered that people had already done this, which was sad as I thought I had just invented the idea, but great as it meant that it was already proven to work and I could find STL files online to print the holders to connect them to a board.
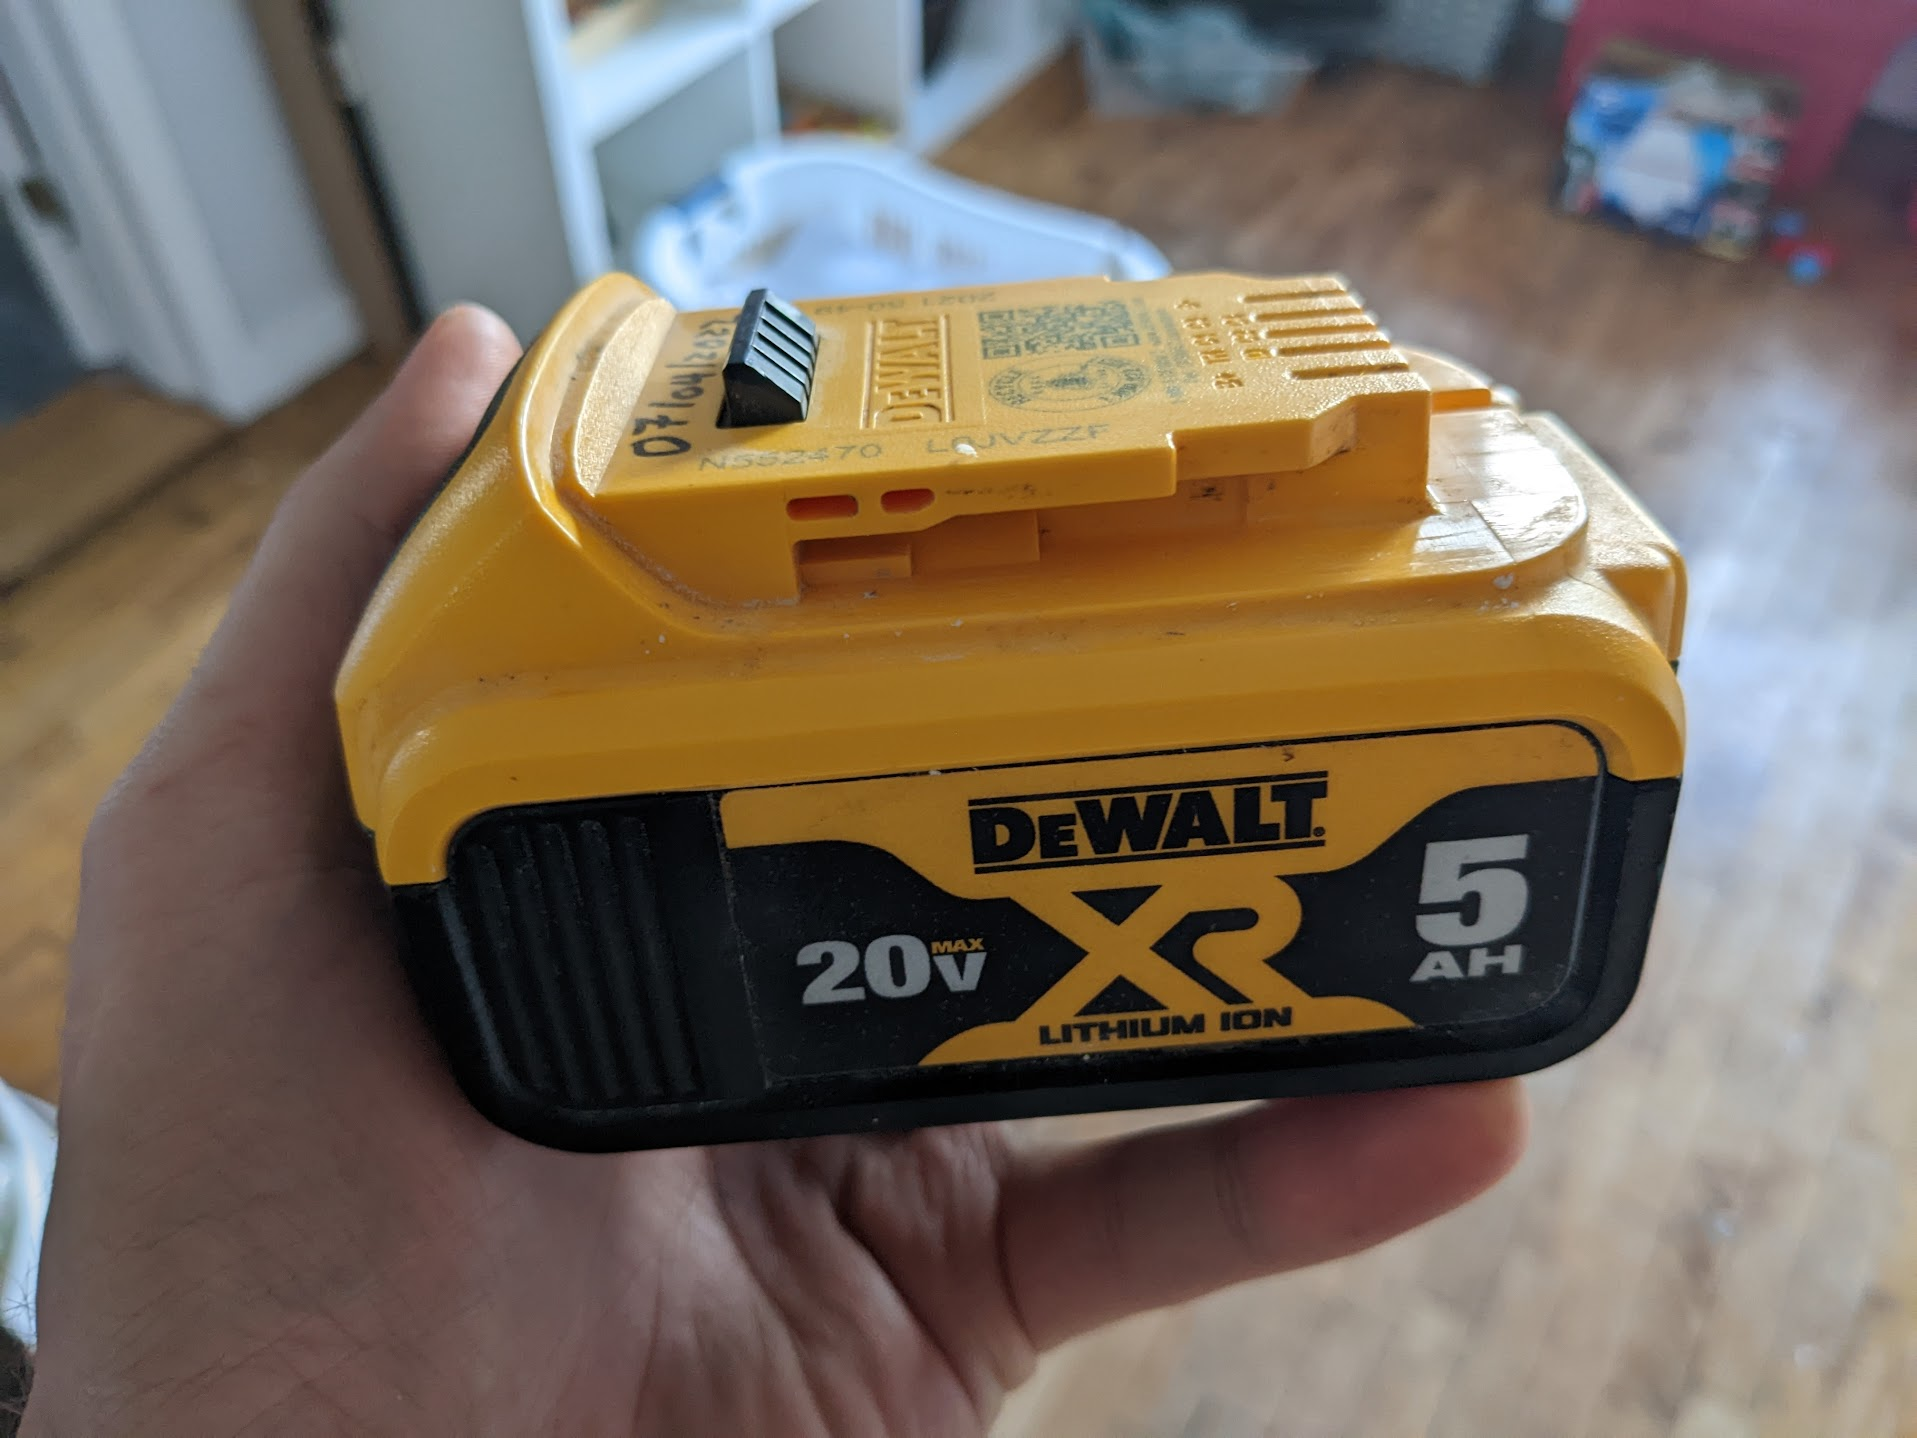
Also, the 5Ah 20V DeWalt batteries were already 5S2P, so I could connect 2 in series for 10S2P which is similar to what is in a lot of production electric skateboards, or I could add another 2 in parallel for 10S4P and get a lot more range and/or current.
These batteries are also rated at exactly 100Wh, which puts them just within the limit that TSA will allow you to carry onto a plane with you in your carry-on.
The cells themselves are Samsung 25R 18650 cells which are rated for 20A continuous discharge, so theoretically each battery should be able to deliver 40A of current. I was not sure if the battery electronics would limit the current, so I was banking on 30A per battery just to be safe.
I used the Topside Mount Whole STL from this project on Thingiverse: https://www.thingiverse.com/thing:3008278
I had trouble fitting the battery in and had to scale mine to 103% in the slicer to produce the desired outcome.
The Board
Ultimately I would like to build a longboard, but for my first board, I decided to keep it small, to keep costs relatively low and to enable the possibility of being able to travel with the board.
As I mentioned, these batteries are within the TSA limits and are easily removable from their holders, so if I kept the board small, it would be a great travel board. I have already travelled a couple of times this year for work and one of my colleagues is a long-time skater, so being able to tag along without my inexperience with pushing a skateboard along seemed like good motivation to keep things portable.
So I asked said colleague for advice on which "cruiser" style board to buy in order to modify. We settled on the JAMMER DIVIDE board from Sector 9.

I then ordered the parts that I would need from Mboards.co. They have a handy kit builder function on their site which I used to make sure that I didn't forget anything.
But while waiting for the parts, I started practising at a nearby park with my kids.
And about a week out from the parts arriving, I realized that this board was TOO nice to hack into an electric skateboard. I had waited an extra week for UPS to deliver it, so I was already a bit emotionally invested in it and when riding it I discovered that it was a dream to ride. The wheels and the bearings etc were so smooth, I just couldn't bring myself to do it.
So, I went to Amazon and found the cheapest cruiser-style board there and ordered that instead.

$44.99 CAD after the coupon sounded pretty good to me. I couldn't find just a deck for cheaper than that and ended up handing the trucks down to my son to put onto his penny board.
The Electronics
Coming from the drone hobby, the parts that go into building an electric skateboard were familiar and simpler than the drone equivalent.
The main difference is that the ESC does all the thinking on a skateboard whereas on a drone, it would be the flight controller and the ESCs are only required to control the motors.
Here is the list of parts that I ordered:
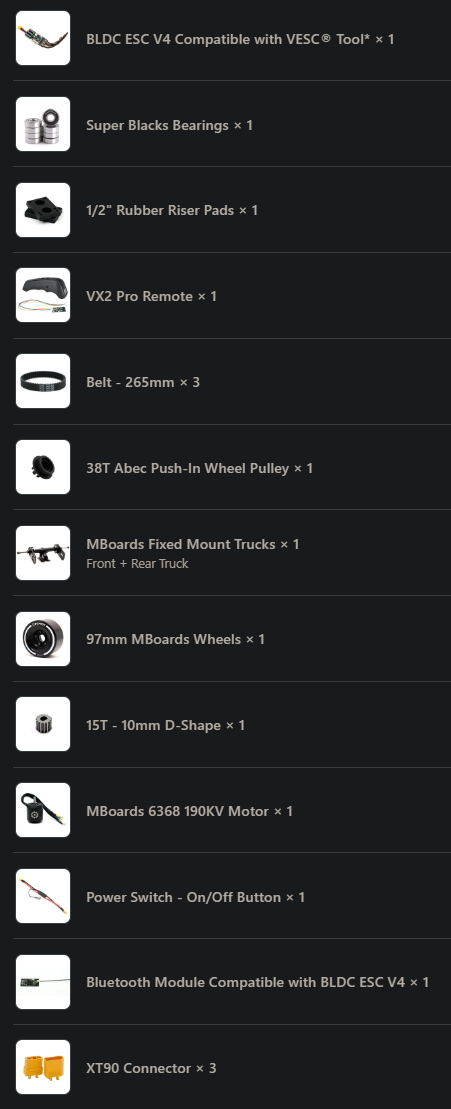
They apparently ran out of XT90 connectors as they cancelled that part of the order, refunded the price of those and sent the rest of the order.
Also, I made a mistake. I ordered a Bluetooth module that connects to the VESC with UART to allow for the programming of the VESC from a mobile device. What I didn't realise is that the receiver for the remote that I picked connects only via UART and the VESC only has one UART port, so I ended up not bein able to use the Bluetooth module.
Assembly
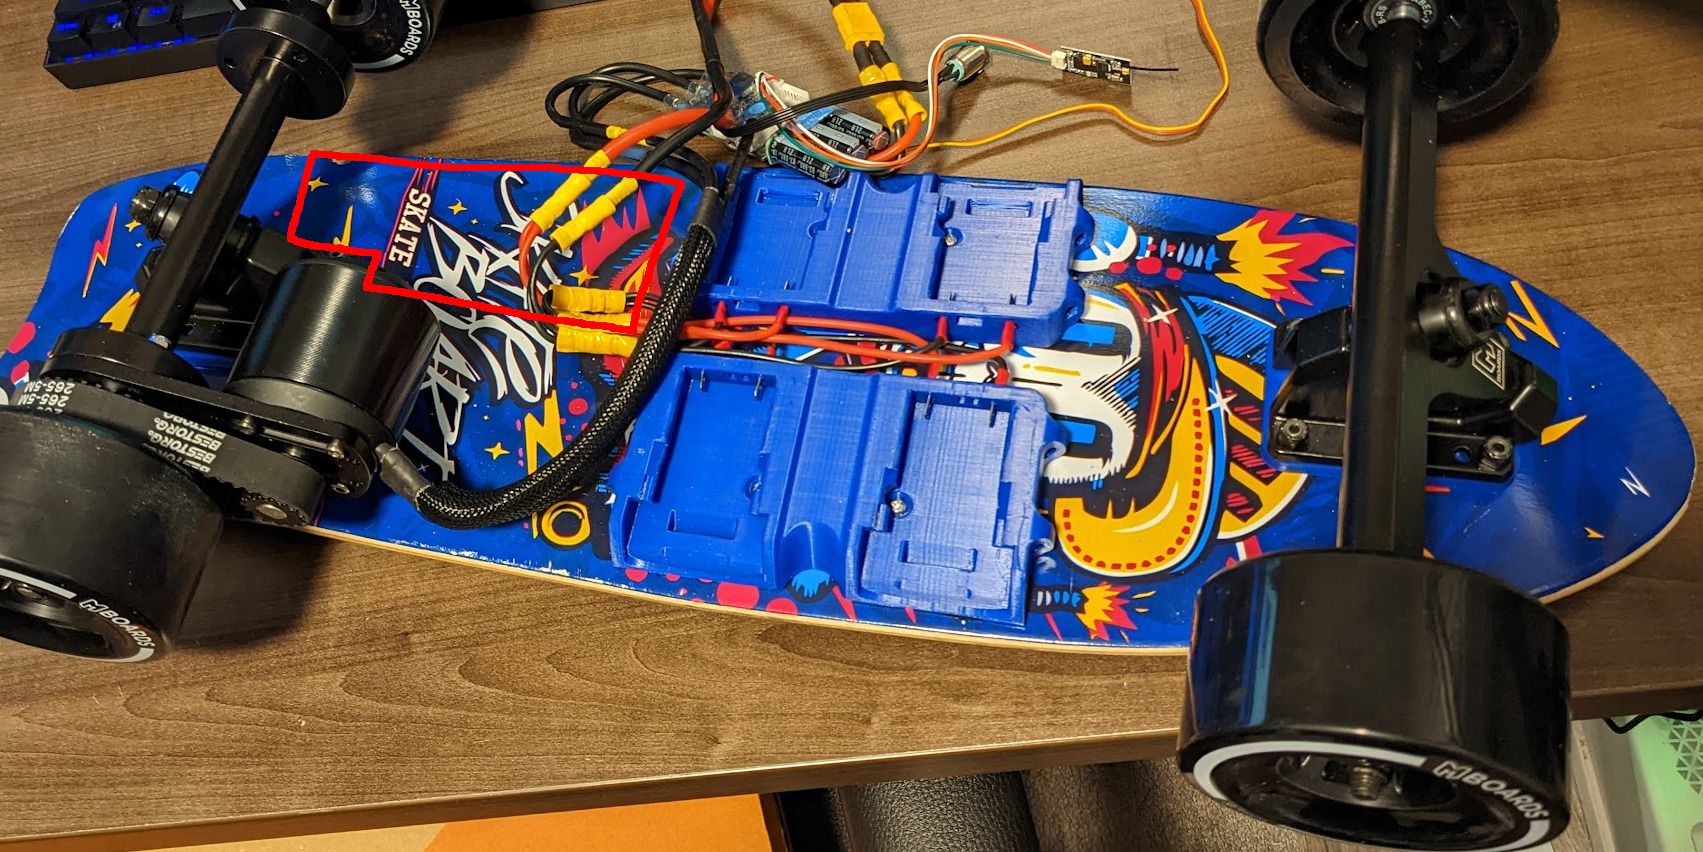
After I messed about for a while, finding the perfect location for the battery mounts, the assembly was fairly straightforward.
The batteries needed to be hooked up with 2 in parallel with each other and then the 2 parallel pairs needed to be connected in series with each other to achieve the 10S4P setup at the cell level that I was looking for.
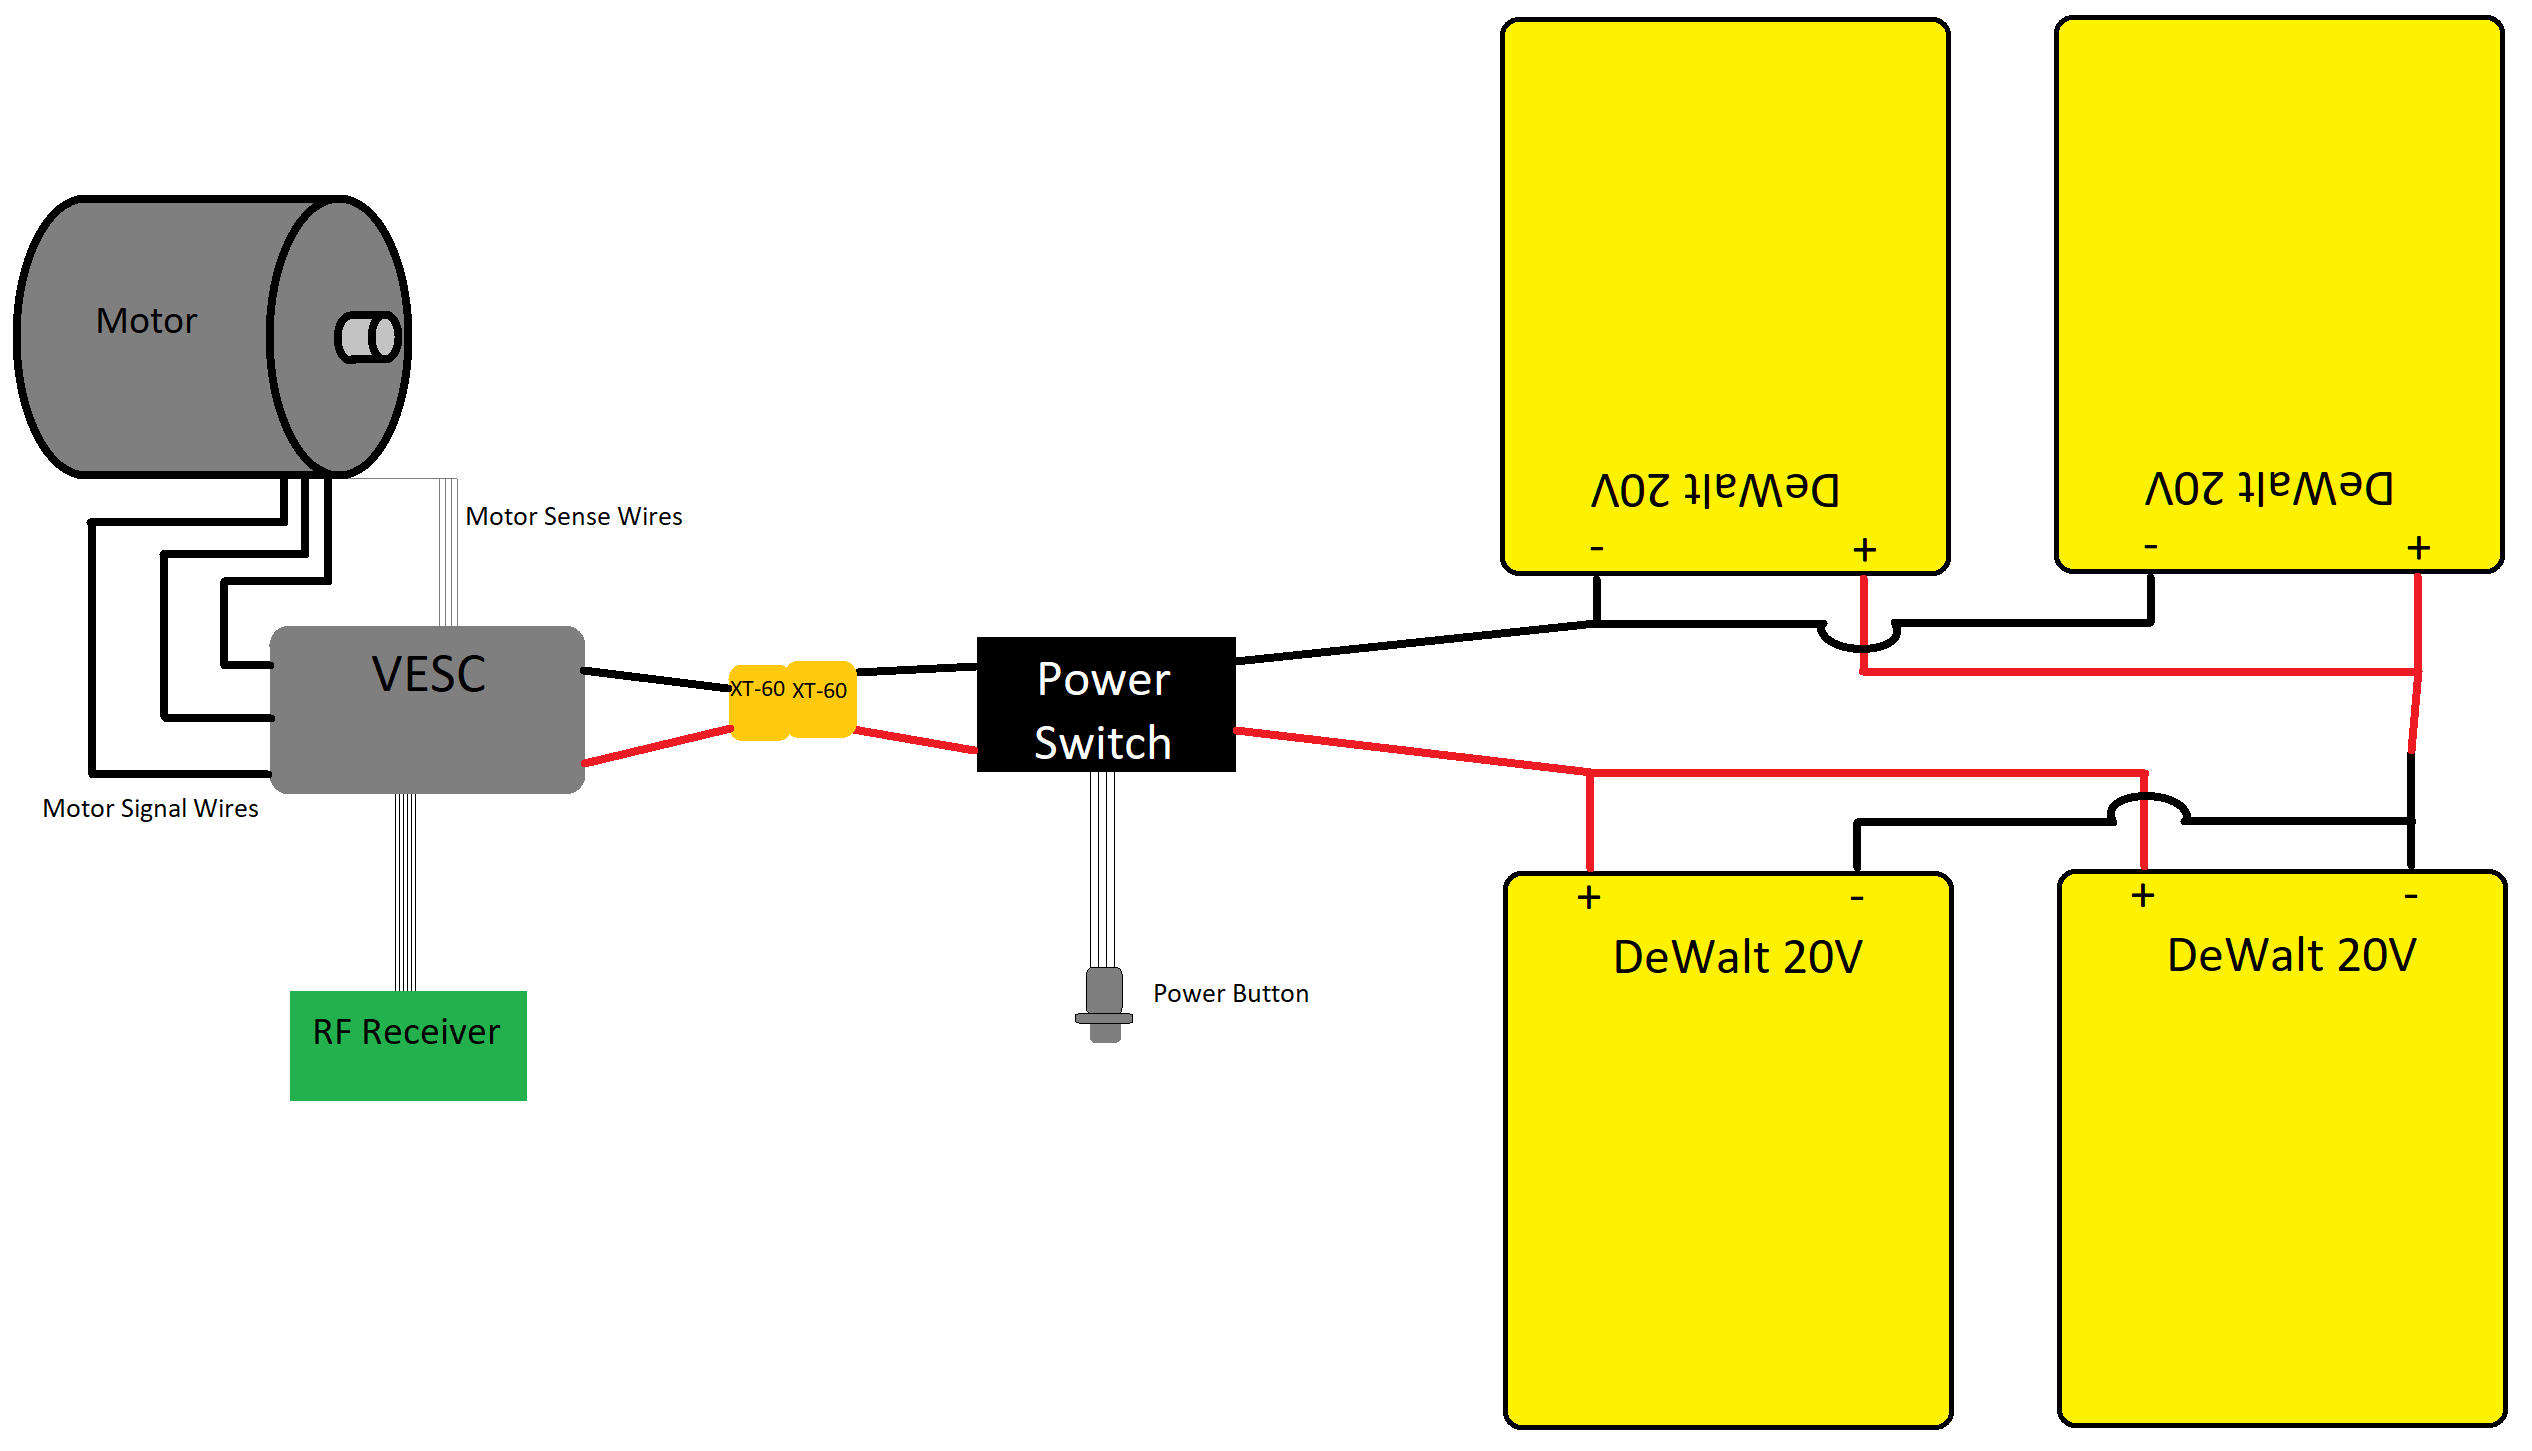
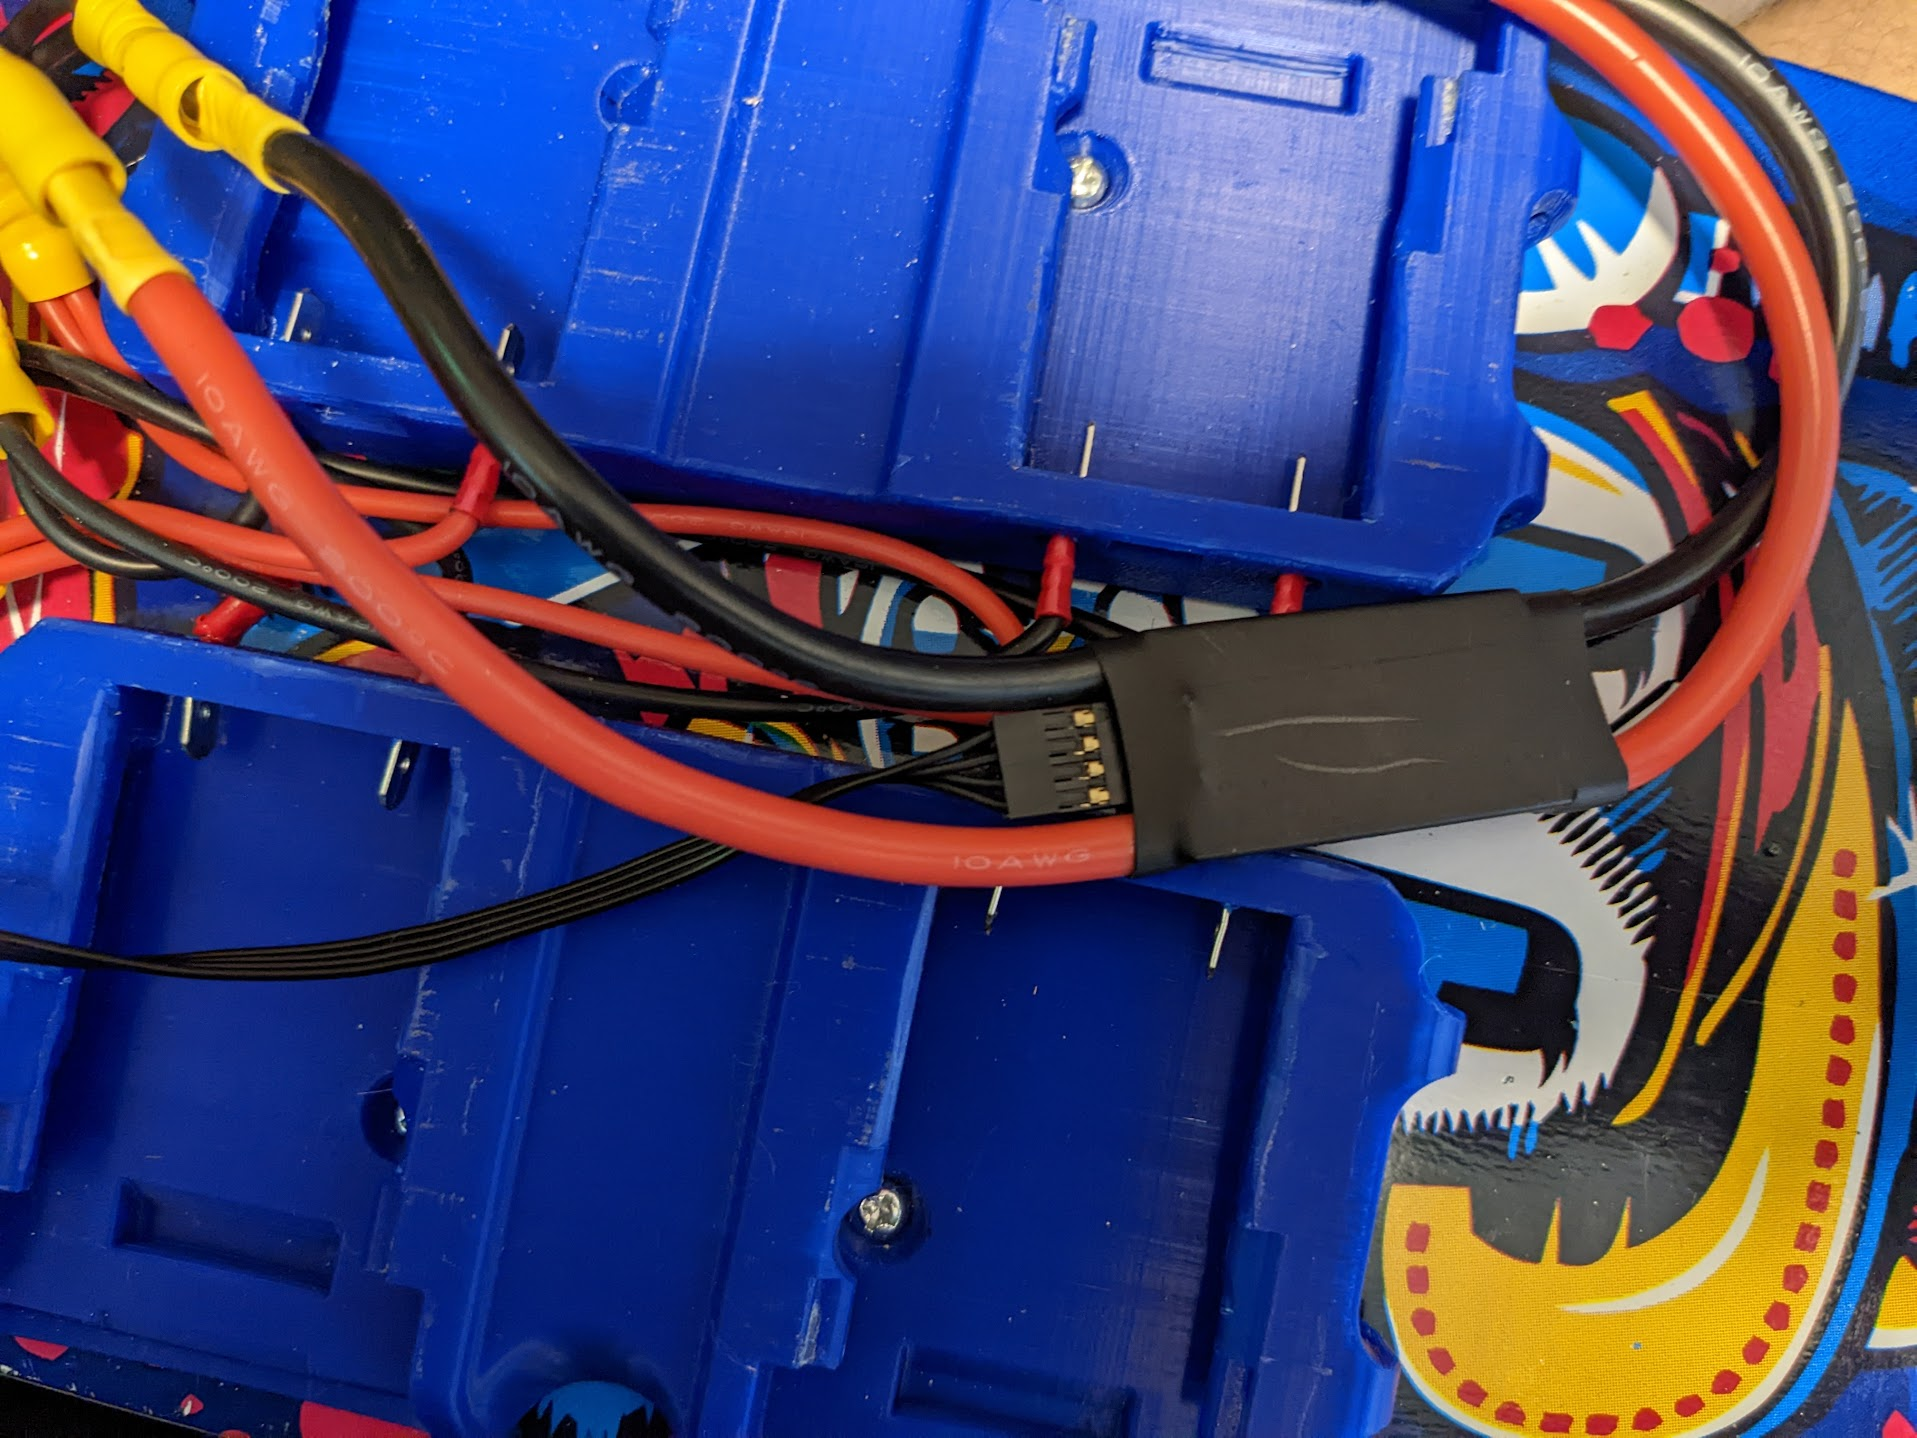
The one issue I did have was that the power switch/spark protector had XT60 connectors, but the VESC had an XT90. The battery part didn't have anything since I made that part. And with the XT90 connector part of my order cancelled I had to try to make a plan.
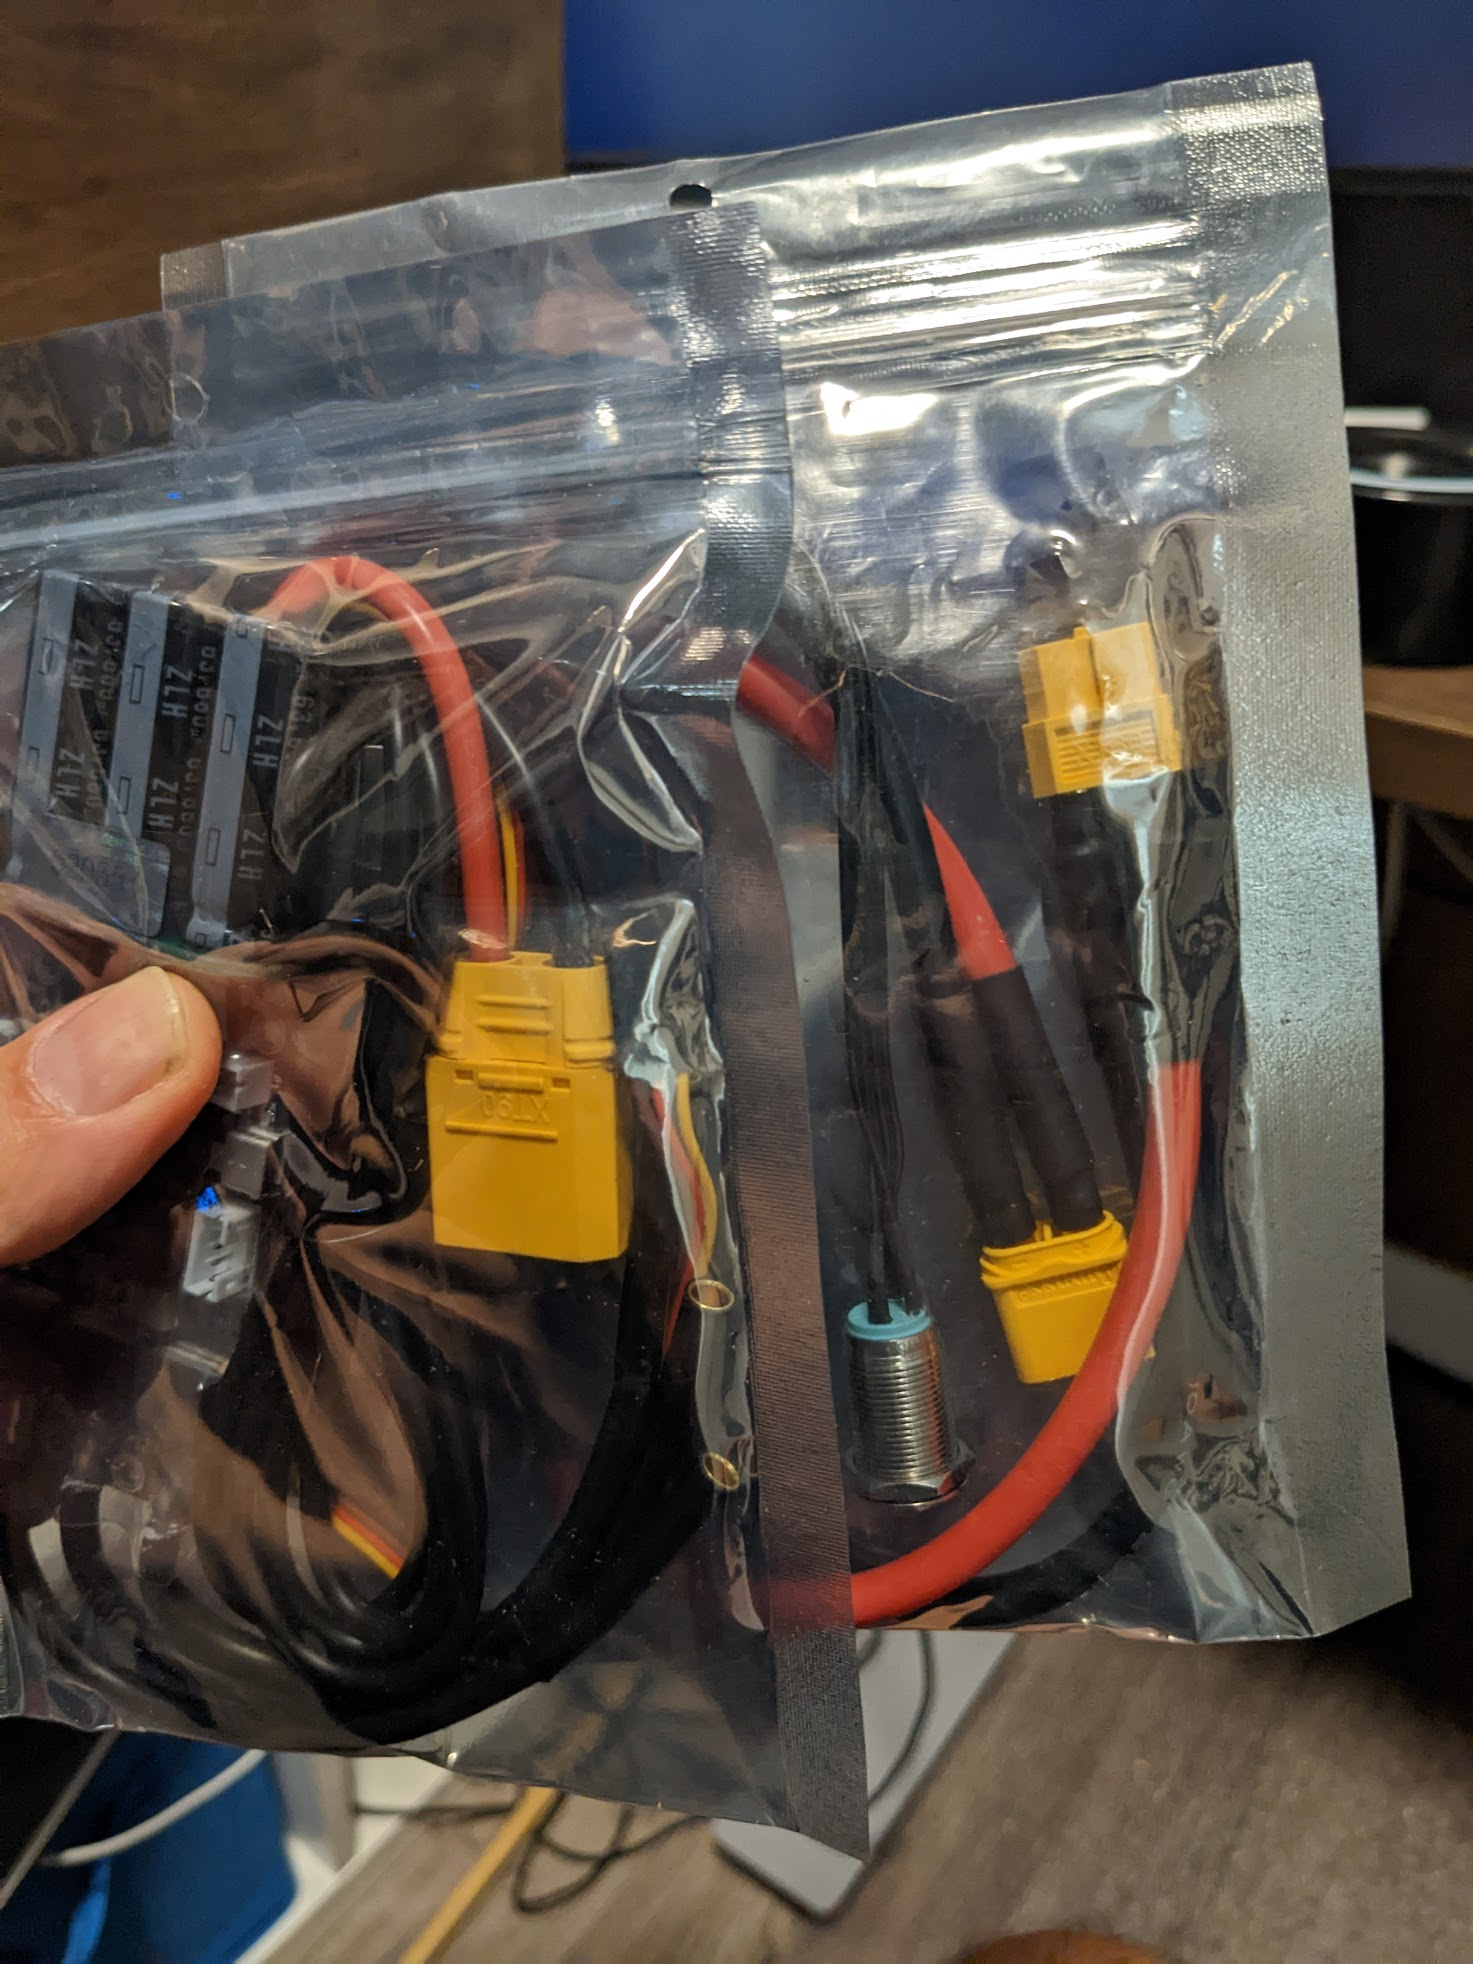
So what I ended up doing is cutting off the XT60 that was supposed to connect the switch to the battery and replacing the XT90 on the VESC with that, as shown in the diagram above. And then I found some bullet crimp connectors that I used to connect the battery and Switch.
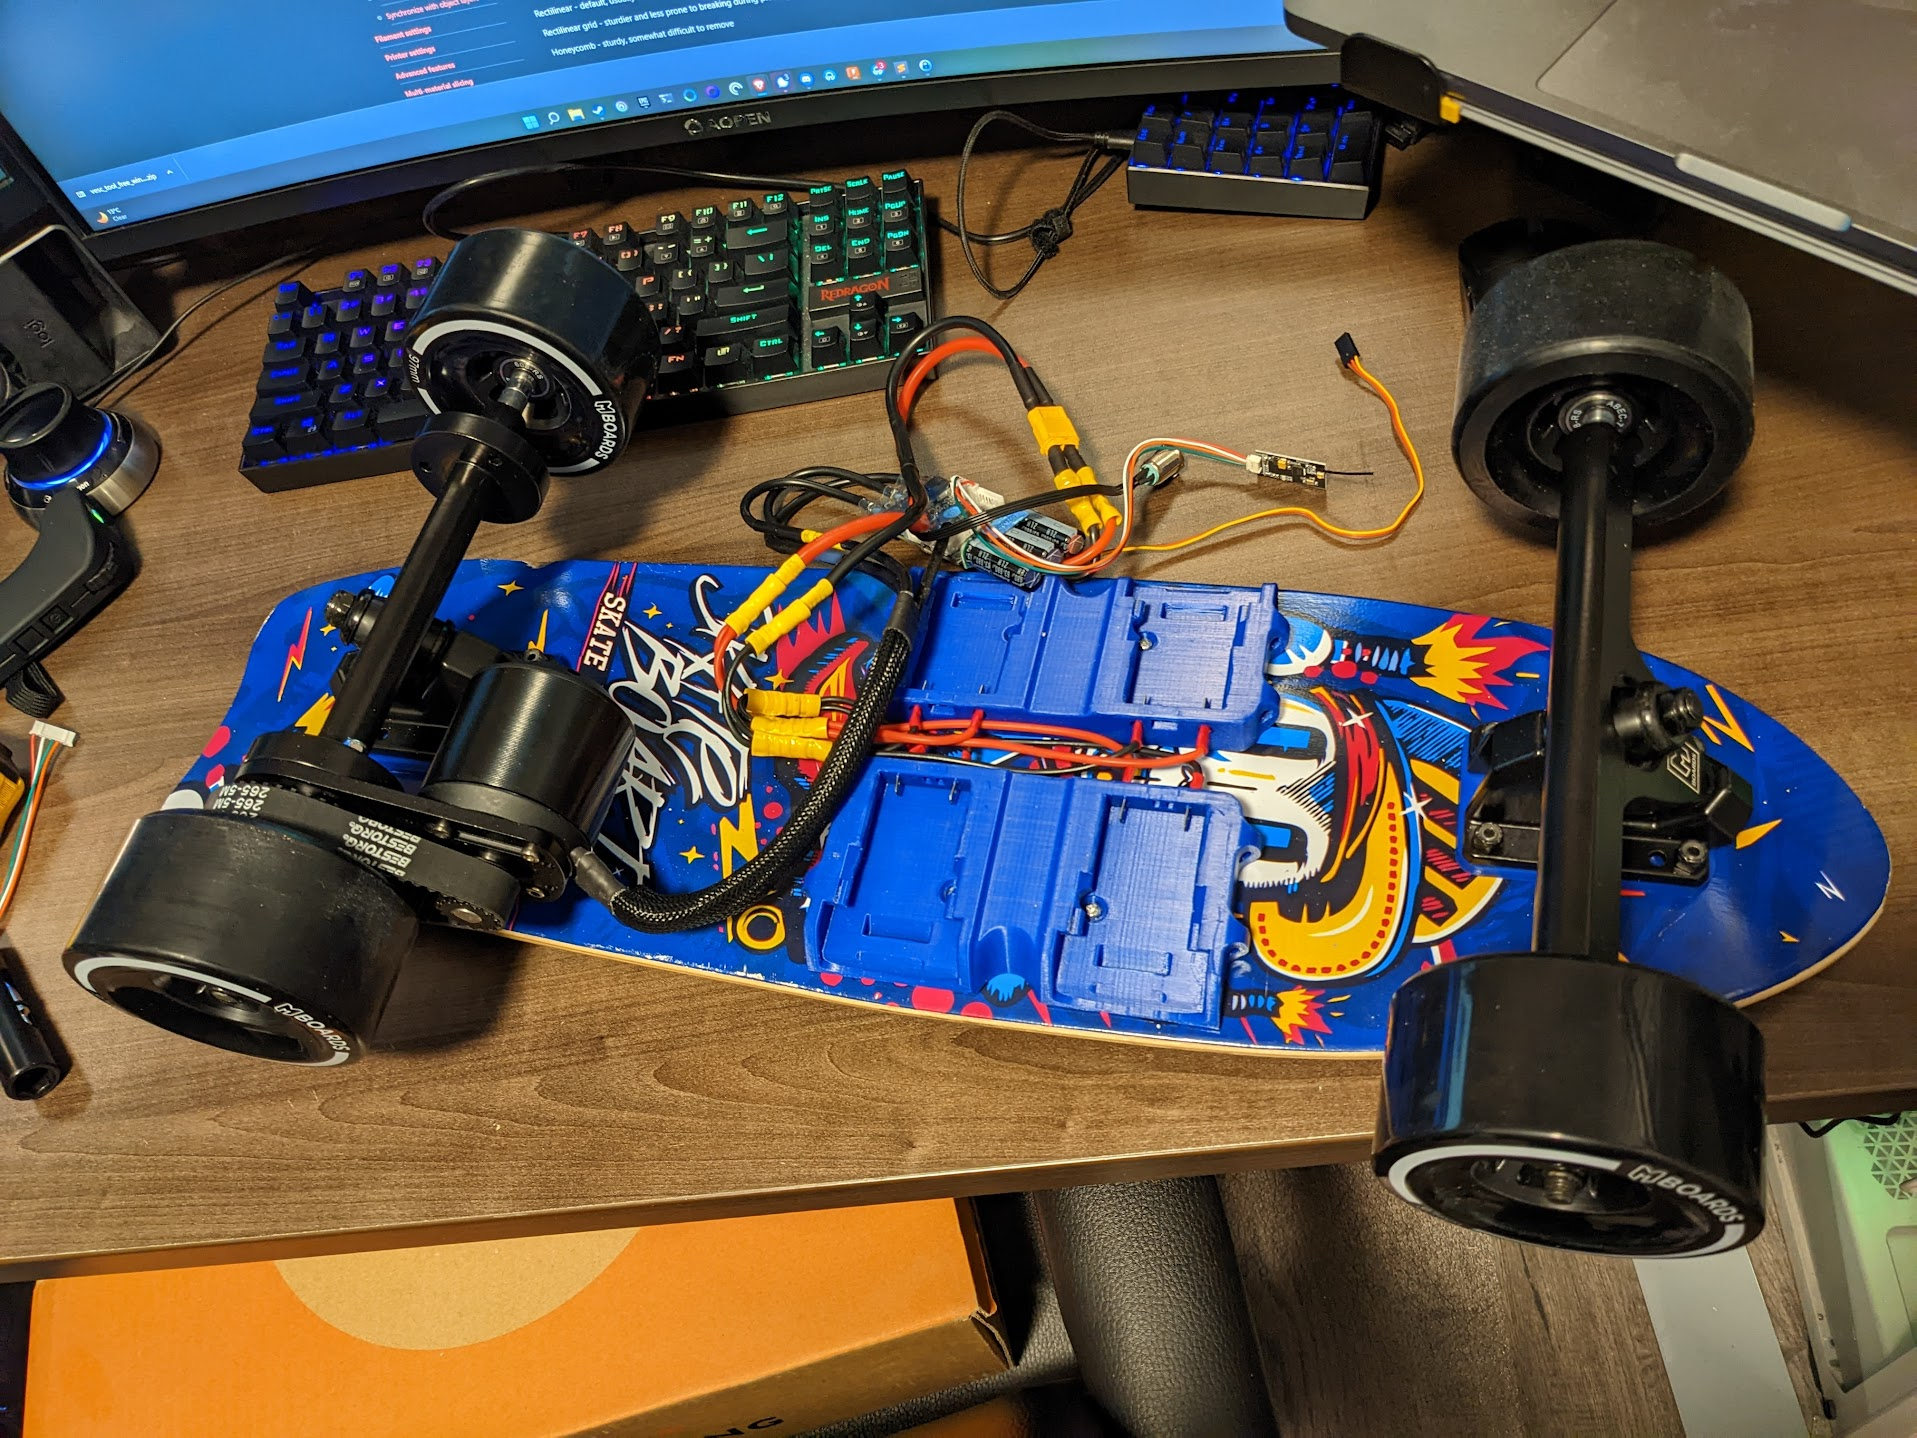
With that, it was all wired up and ready for programming (but not ready to ride as the cables were all loose).
VESC programming
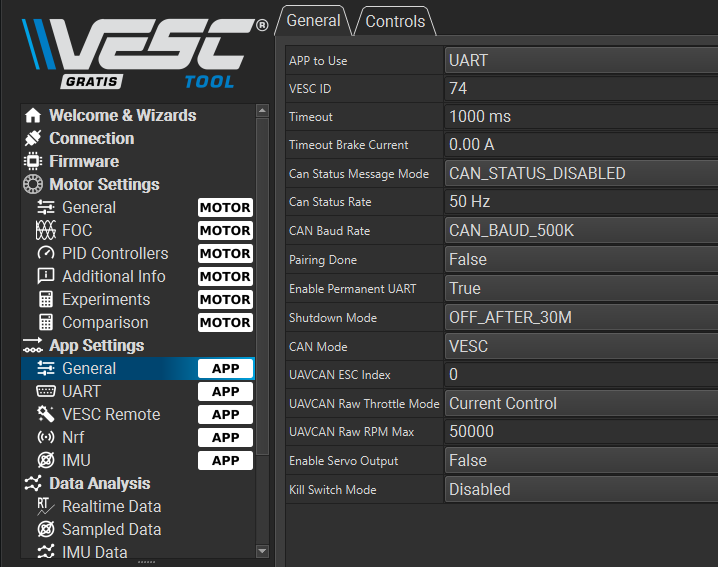
Programming the VESC was mostly straightforward, I plugged the VESC into my computer, with the motor and batteries attached.
I booted up the VESC application and it connected without the usual fuss that is associated with connecting Arduinos or any other type of non-standard hardware to a Windows PC.
I connected and ran the motor setup wizard, picking the settings that matched my setup.
I picked 60A for battery discharge and -6A for battery charge. The cells are rated for quick charge of up to 4A each, which would be 16A total at 4P, but I decided to keep it more conservative initially and see how the braking behaves.
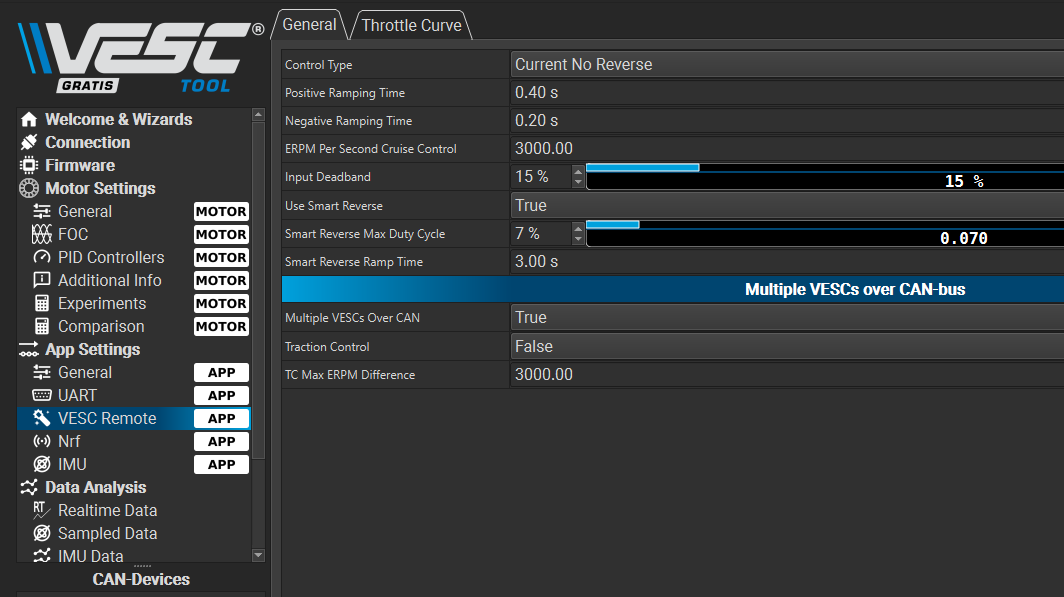
The main thing that caught me out was connecting the remote. It took me a while to figure it out and after combing through a few YouTube videos and forum posts I figured out that I had to set the App to UART on the general page and on the VESC Remote page, I had to set it to Current No Reverse.
Electronics housing
So, the board was wired up and the remote made the wheels spin. I gave it a quick test ride by taping the electronics to the underside, but I needed to come up with a more permanent solution.
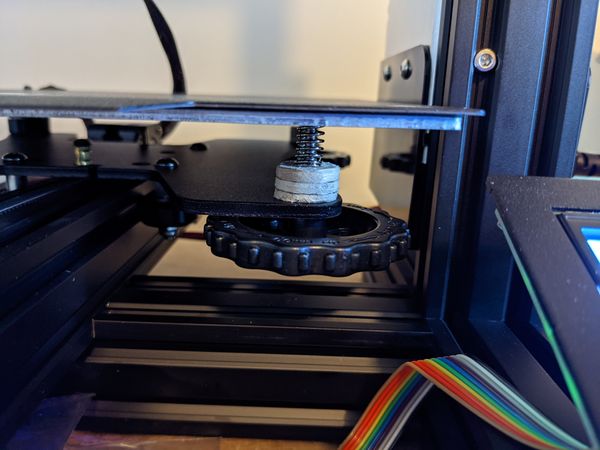
The space was pretty tight, so I decided to design my own enclosure in the space that was available.
I spent a few minutes in Fusion 360 and came up with a design.
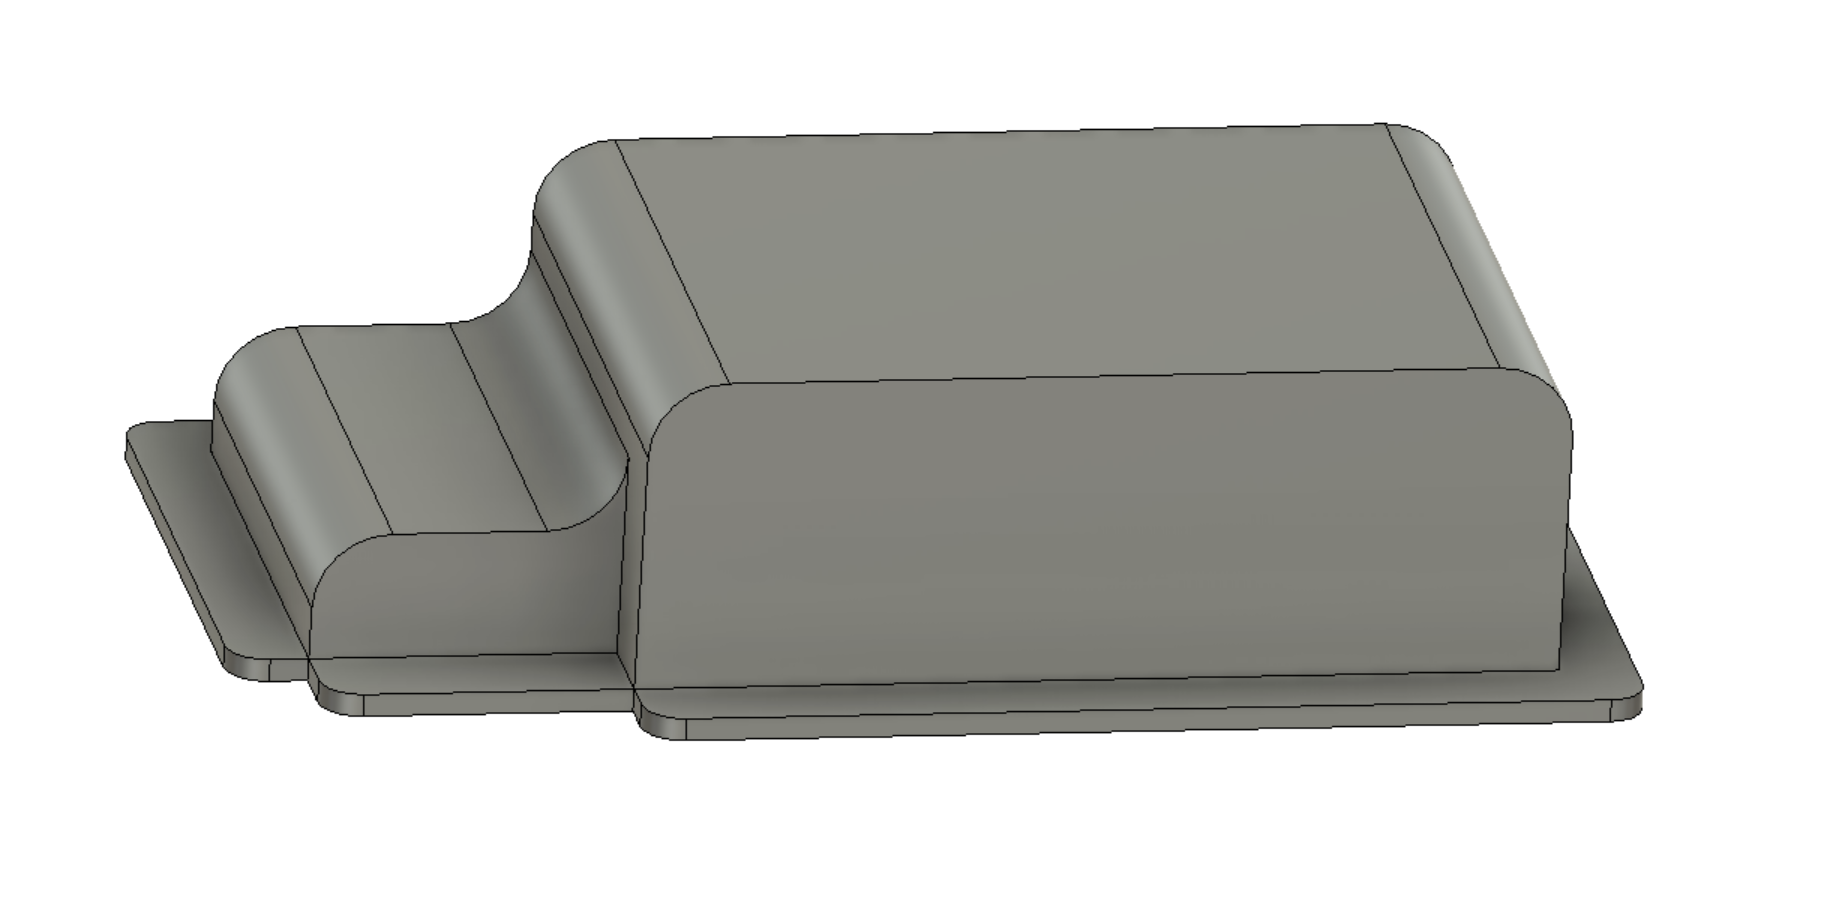
Now, at this point in the build, it was about 1 am and I needed to get this housing printing as I had a group ride planned for later that day. So I rushed it onto the 3D Printer and when I woke up the next morning, I realised that I forgot to adjust the width after I had made some design changes, so it was too big to fit.

But since I didn't have time to make a new one, when it had finished printing, I took some side cutters to it to make it fit and managed to screw it down, give it a quick test before rushing off to the group ride.
Testing it out
The group ride was at a friend's place. He was much bigger into esk8 than I was and he had 2 Onewheels and 2 Electric Unicycles at his place, so the group of us that arrived managed to try a bit of everything. Here is a short video of me riding his OneWheel Pint X and a friend trying out my board.
It worked pretty well. Despite having only a single motor and a short wheelbase it still had a decent amount of power and wasn't too wobbly.
Here is my son trying it out a couple of days later, he thought it was a bit too powerful, even when set to low mode. 🤣
A clip of my son trying out the #DIY #esk8 monstrosity. 🤣 pic.twitter.com/HxH7ZMuZqj
— Jayd Lawrence (@JaydTheDev) November 9, 2022